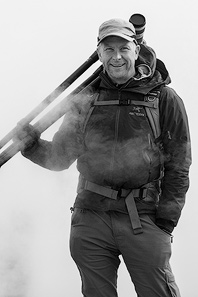
I recently produced a series of Photoshop video tutorials called The Complete Guide to Luminosity Masks to help people learn how to use Luminosity Masks in their image developing repertoire. Luminosity Masks are very powerful tools for making refined image adjustments in Photoshop. Their use in landscape and nature photography was originally developed and established by my friend and colleague, Tony Kuyper, with whom I collaborated on the videos. Tony’s Luminosity Masking techniques revolutionized the way photographers like myself, as well as all the members of Photo Cascadia, are able to make adjustments to our images within Photoshop.
If you are familiar with Tony’s work, his written tutorials or his Photoshop actions, then you already have at least basic knowledge of Luminosity Masks. For those just being introduced to Luminosity Masks I thought it would be helpful if I briefly explained what they are and what they can be used for.
Luminosity Masks are actually just one of many ways to create layer masks in Photoshop. Like other types of masks, they can be added to any pixel layer or adjustment layer to control where and to what extent an adjustment or filter will be applied to an image. For example, let’s say I’d like to use a mask to constrain a darkening adjustment only to the sky in this image.
For the purpose of comparison let’s consider a very simple way to generate a mask; painting on a mask with a white or black brush. White areas of a mask will reveal any adjustments made on the layer, black areas will conceal any adjustments made on the layer and shades of gray will partially reveal adjustments depending on how dark the shade of gray is. In the mask below I have painted the landscape black and left the sky white so that the effects of a darkening Levels adjustment will only be revealed in the sky. By using a soft brush I was able to feather the boundaries of the adjustment.
Depending on the situation, painting a mask by hand can be challenging and often leaves dark or light halos along edges.
In the next example I created a more precise but non-feathered selection of the sky using the quick selection tool and then created a Levels Adjustment Layer with the selection active. The Levels Adjustment Layer is generated with a mask that automatically reflects my sky selection. This mask constrains the adjustment to the sky like the first mask, but with a very abrupt edge.
Depending on how detailed the edges are and how much feathering is needed to make transition zones look natural, this may or may not be the right technique.
There are many instances when a hand painted mask, or simple selection mask, or any number of other types of masks might be the right tool for guiding an adjustment. But as seen in the previous examples they can leave light or dark halos across boundaries or the abruptness of the transition zone does not look natural.
While they aren’t the perfect and single answer to all masking situations, Luminosity Masks can often do a much better job of guiding adjustments in a way that is perfectly feathered into the image and natural in appearance. The example below shows what a Luminosity Mask targeted toward the luminosity values of the sky looks like. Because it is created from the actual luminosity values of each pixel in the image it matches the image pixel for pixel and allows the adjustment to feather itself within the image seamlessly.
So, where do Luminosity Masks come from? The luminosity values of the color channels in the Channels Panel in Photoshop are used to create luminosity based selections, and these selections can in turn be used to generate Luminosity Masks. In this way Luminosity Masks are just like other methods of creating selections and masks, which means they can be used to guide any type of adjustment or filter, not just Levels or Curves adjustments. Luminosity Masks are simply far more detailed than other masking options. They are also completely self feathering and they allow the user to target different regions of an image based on luminosity or tonal values. Learning to make and use Luminosity Masks takes time and practice. The written tutorials on Tony Kuyper’s website go into great detail on how how to make and use them. Tony has also developed Photoshop actions that streamline the process of mask creation to just a few simple clicks. This video demonstrates how (make sure to view at 720pHD).
Since Tony first published his Luminosity Mask techniques back in 2006 he regularly receives requests for video instruction to support his written tutorials and actions. After he and I discussed the idea for a year or more, we decided to collaborate on a video series, with me writing, recording and producing videos to directly support Tony’s techniques and actions and with Tony consulting and contributing his vast knowledge.
The video segments from The Complete Guide to Luminosity Masks below offer more of an introduction to Luminosity Masks and how I teach them in the video series Both Tony and I are also happy to answer questions. You can leave me a comment in the comments section below or email me at [email protected]. Tony can be reached through his website, www.Goodlight.us.

Sean is an outdoor photographer, digital image developing enthusiast and photography educator based in Ashland, Oregon, where he resides with his wife and two sons. His previous career as a science teacher makes photography education a good fit. Sean teams up with fellow Photo Cascadia members leading workshops. He also teaches digital image developing classes, lectures and offers a series of Photoshop video tutorials.
More posts by Sean Visit Sean’s Image Gallery Visit Sean’s Website


Recent Comments