
Digital cameras have revolutionized our ability to create images of the night sky. Using film, there are essentially two ways to expose a night sky image. One is to leave the camera shutter open for a LONG time on a fixed tripod. This technique creates star trails as the earth rotates beneath the sky. It’s a great visual effect but doesn’t capture the stars as individual points of light, the way we see them. The other method is to attach the camera to a rotating mount that tracks the motion of the stars…and then leave the shutter open for a LONG time. This produces very detailed night sky images with pinpoint stars and glowing nebulae. But because the camera is rotating to keep up with the stars, any landscape in the image becomes motion blurred. Digital cameras allow us to boost the faint starlight signal (by turning up the ISO) so that a 30-second exposure can be as bright as a traditional image that has been exposed for hours. This means that we can capture both the stars and the landscape with clarity at the same time.
A decade or more ago, when I first started seeing and creating digital night sky images this was a mind-bending concept, as were the images. Before that night sky images, while beautiful, were harder for me to relate to. They were either surreal concentric rings of star trails, or they were a telescope’s perspective of deep space, out of context with the landscape. Now, realistic photographs of night-time landscapes have become commonplace, with the stars and Milky Way sharp and detailed the way we see them…but actually better because the faint light can be rendered brighter than our eyes perceive it. Cameras, firmware and processing software continue to improve, so our night sky images just keep getting better and better.
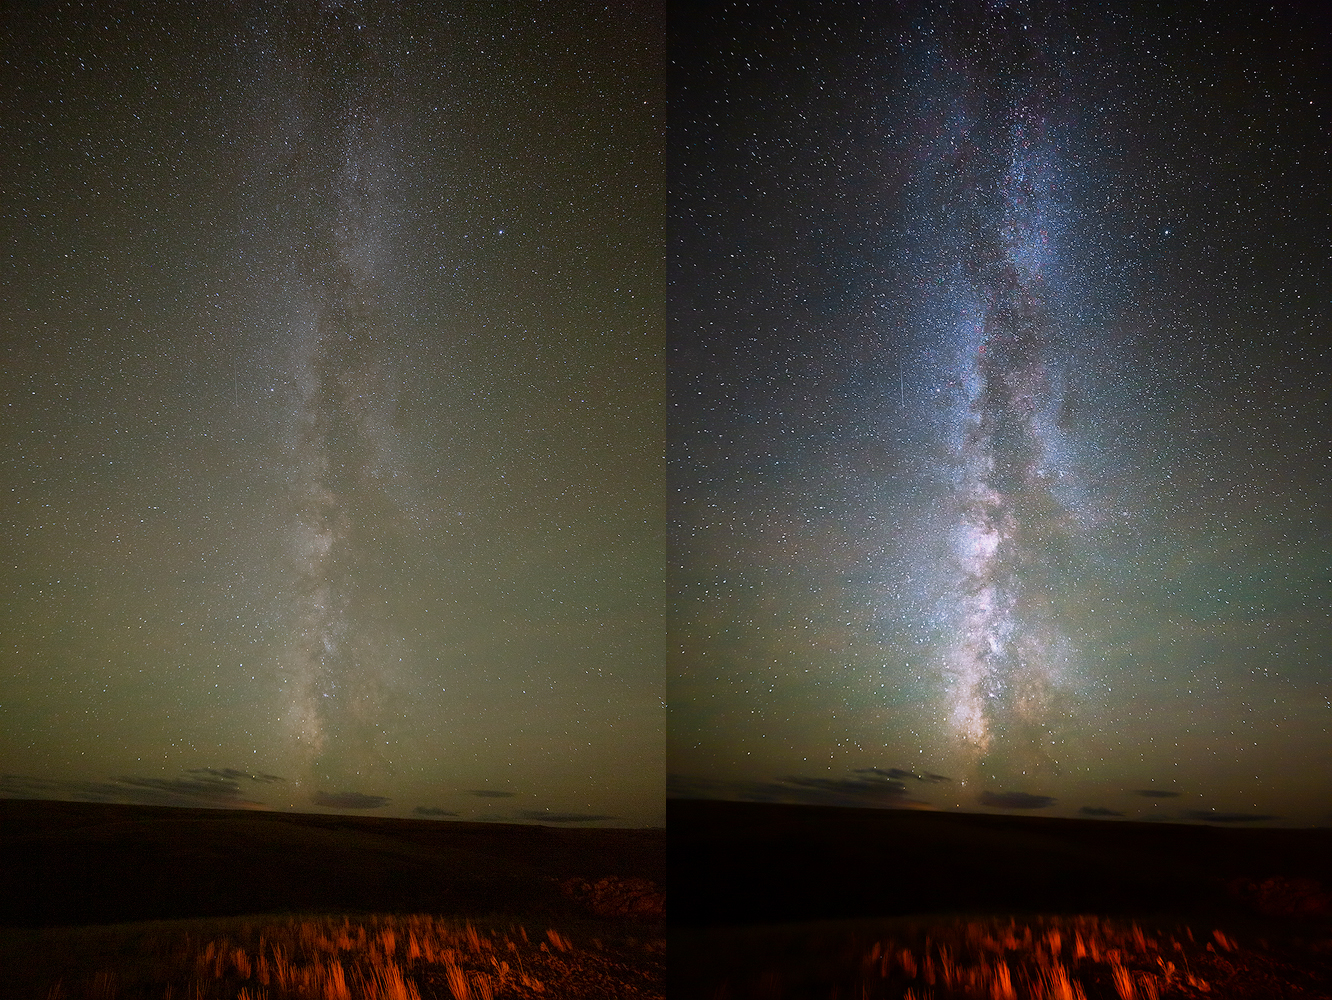
In addition to knowing how to capture night sky images, there are some tricks to getting the most out of them in post-processing. If you do a web search or YouTube search you will find countless articles and videos with tips for general starry sky developing. I have incorporated many of the techniques I have learned from others in my workflow. In the video tutorial above I show 3 of my own techniques for enhancing night sky photos in Photoshop using luminosity masks that I think do a better job than other methods I have tried.
The image enhancement techniques I show in the video are:
- Luminosity painting to enhance contrast, depth and contour, particularly in the Milky Way.
- Selective noise reduction using the Camera Raw Luminance Noise Reduction in combination with a luminosity mask.
- Selective clarity usingTKActions clarity in combination with a luminosity mask.
There are certainly many other great to use luminosity masks when developing night sky. If you have your own luminosity mask technique for developing night sky images you’d like to share, post it in the comments. Perhaps I’ll make a part 2 to this video and if I use your idea I’ll make sure to give you a call out.
Sean is an outdoor photographer, digital image developing enthusiast and photography educator based in Ashland, Oregon, where he resides with his wife and two sons. His previous career as a science teacher makes photography education a good fit. Sean teams up with fellow Photo Cascadia members leading workshops. He also teaches digital image developing classes, lectures and offers a series of Photoshop video tutorials.
More posts by Sean Visit Sean’s Image Gallery Visit Sean’s Website
Recent Comments