
Why would you want to build your own PC and why did a life long Apple user like myself build a custom PC? There are several excellent benefits to building your own custom PC. The cost to performance ratio is significantly better if you build a PC yourself. You can also customize your build using components that will provide much greater performance for the specific tasks you do every day. You can also build your PC to the form factor that best suits your work space and add aesthetic touches as well. In this article I’ll share my own experience researching and building a custom PC specifically tailored for Photo and Video editing. I also want this to be a primer for anyone who might be curious about building their own PC. Included at the end is a parts list for the system I would build in 2021.
History:
What led me to want to build my own PC, and why not another Mac? I’ve been an Apple computer enthusiast since I was a teenager. I still prefer the Mac OS to Windows, but windows and a custom PC offer customization and upgradability that apple computers do not. I was always frustrated by the lack of choice in components when ordering an Apple desktop computer. You usually have almost no choice in graphics cards, and your RAM and hard drive options are quite limited and expensive. It’s also difficult to upgrade apple desktops. In the custom PC world, I can use any components I want to. I can also upgrade those components in the future to make them last longer. One of the biggest advantages of building a custom PC is the price. I was able to build my custom PC for half the price of an equivalently specced Mac Pro. I also like that I can customize how my PC looks. There are so many amazing custom PC builds out there that are stunningly gorgeous and original. I didn’t go too crazy with my most recent build, but I probably will with my next build.
When I started noticing significantly slower performance during photo and video editing sessions, I started researching my upgrade options, both Mac and PC. I decided to build my own custom PC based on the previously mentioned reasons. I still love my old Mac Pro tower (the black trashcan model) I currently use dual monitors, one connected to my Mac and on to the PC, sometimes I run a dual monitor setup on the PC. All my photo editing is done on the new PC, everything is very responsive, smooth, and quick. Video editing is still done on the Mac, but that’s only because I know Final Cut Pro really well and it’s already paid for. Eventually this will also be done exclusively on the much faster PC. Email, web browsing as well as watching Netflix and YouTube I do on the Mac. The dual system is working out really well so far. I may even upgrade to another Mac down the line.
Research and build plan:
Evaluate your computing needs:
What kind of computer user are you? Are you a power user churning out videos and photos every day, a home professional using multiple professional media editing applications fairly often, or a more casual photo editor who dabbles in video editing, or plays PC games? What kind of user you are will determine what parts will provide you with the right cost to performance ratio.
Form factor:
For instance, I have decent amount of room in my home office, that allowed me to choose a large premium PC case that offers excellent air flow and room to build in. If you are more limited on space, there are many options to help build a much smaller computer. There are small form factor cases, mini and micro ATX motherboards and small form factor graphics cards that allow for very small custom builds.
Parts list:
What components, or computer parts are going to provide the best performance for the money for your intended use? I’ll go over the key components that determine the performance of a PC.
Processor (CPU): The CPU, or central processing unit is the main engine of your PC. The CPU is what performs all of the computations that run the software on your PC. It is the single most important component when considering performance of applications like Adobe Lightroom, Photoshop and Premier. Consider how you use your PC. If you are a power user producing new videos and photos every day, you would benefit greatly from a CPU with a ton of cores such as a Threadripper CPU. Photo and video editing are very system intensive tasks, meaning they utilize a lot of your available CPU cores, RAM storage capacity and system bandwidth. These monster CPUs are essentially home super computers, they can have up to 30+ processing cores taking advantage of multithreading technology and crushing through video renders at blazing speed. To get the best performance out of this kind of CPU you also need a large amount of fast RAM, I’ll touch on this a little later.
On the other hand, if you are more like me who processes photos fairly often and works on video projects occasionally, you would be better off with something like the 12 core Ryzen 5900x, or the 10 core Intel core i9 10900k. These processors have less cores, but much faster clock speeds. Photoshop in particular performs faster with faster core clock speed. Both of these are still very high end components and have enough cores to run several professional media editing applications at the same time.
If you only do photo editing, or some light video editing occasionally, or you play PC games, you would benefit most from something like a 6 core Ryzen 5600x, or a 6 core Intel i5 10600k. These both still have very high core clock speeds, but less processing cores. They will provide the same performance in applications like Photoshop and Lightroom, as well as any PC games, but don’t have the same multi-core performance that can run several applications simultaneously, or render videos quickly.
Motherboard:
After you choose your CPU, you can choose a compatible motherboard. The motherboard holds the main components together, delivers power to them and allows them to communicate with each other. The main thing to think about when choosing a motherboard is compatibility, but there are some features of more expensive boards that provide performance advantages, such as better power delivery, or fast communication speeds. There are different sizes as well. I chose a regular ATX size mother board to have lots of room during the build process and maximum air flow inside to keep components cool. There are also mini ATX and micro ATX if you want to build a smaller computer. Motherboards have different sockets to accept specific CPUs. There are separate boards for AMD and Intel CPUs. Sometimes there are different socketed boards for newer families of CPUs as well. Make sure your motherboard is compatible with your CPU. I use the website pcpartpicker.com to do a virtual build first, it has a compatibility checker that will alert you if there are any compatibility issues. I’ll talk more about this tool in a later section. You can learn more about what motherboard might be best for you in the YouTube links at the end of the article.
Ram:
RAM is also important and will affect the performance of your computer. RAM, or random access memory is located right next to your CPU on the motherboard. Data can’t be accessed by the CPU until it’s loaded into RAM. For instance, when you startup Photoshop, the program files are loaded from your storage hard drive into the RAM. When you want to edit a photo, the photo file is also loaded from your storage hard drive into RAM so the CPU can do all the photo editing computations you ask it to. I chose to use 64 gigabytes of 3600 speed RAM. Most users like myself could probably get away with 32 gigs of RAM, but even now I’ll use more than 32 gigs when running several programs at the same time and my computer tasks will only get more demanding in the future. If you don’t have enough RAM installed, your computer will have to access the data from your much slower hard drive first and you will experience lag and sluggish performance. Generally, you want the fastest and highest quality ram you can afford. AMD Ryzen CPUs in particular benefit from faster RAM.
Fast storage and media storage drives:
I built my system with super fast M.2 PCI based hard drives. Windows and all my applications are stored on these drives for fast load speeds. For my media storage drives I use all solid state drives for quick read and write speeds when loading and saving large files. I also use some external drives that are formatted as exfat for backing up media and sharing media files between my PC and Mac.
Graphics card:
A dedicated graphics card, or GPU is important, but you don’t need to go overboard and spend a fortune on one. Lightroom, Photoshop, Final Cut Pro and Premier do utilize your graphics card to help render on the fly. You definitely see better performance if you are working with 4k or higher resolution video footage. PC games benefit the most from a high end graphics card. The 3080 I have listed in my recommended build is probably overkill, but there is a serious shortage of graphics cards right now. If you can find an older generation Nvidia 2080, 2070, or 2060, or the equivalent AMD graphics cards for a decent price, they are fine options.
Power Supply:
A PSU, or power supply unit delivers power to the motherboard and all the components in your system. It’s a crucial and important part of your computer. Generally you want a high quality PSU with enough capacity to power all your components and have some head room in case of any spikey power consumption, or in case you upgrade components in the future.
Case:
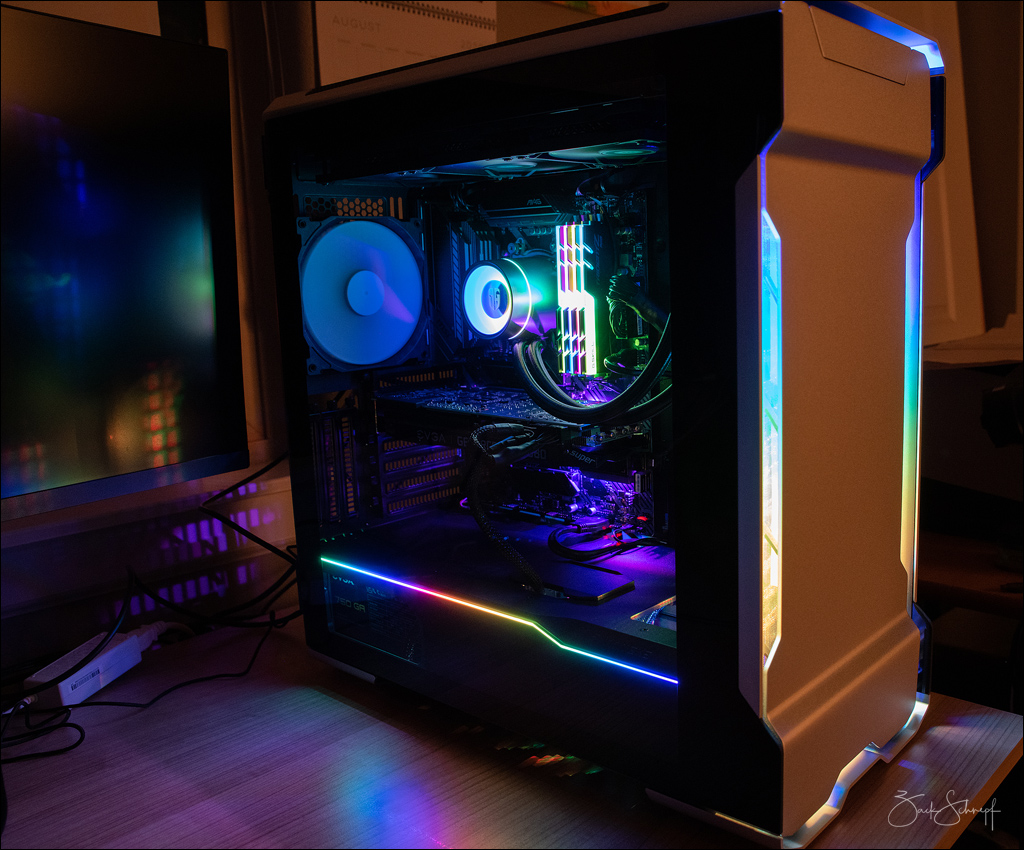
There are a ton of case options available. This is where you can get creative with the look of your computer or choose a specific form factor if you have limited space. I went with a larger case, partly because I really liked the aesthetics, but it also has a lot of room for extra hard drives, airflow and my CPU cooler radiator. You can see the case I would recommend in the parts list below.
CPU Cooler
I chose a liquid cooler with a large 3 fan radiator for my build, but this was more of an aesthetic choice. A quality air cooler is more reliable, just as quiet and will cool the CPU just as well. Some CPUs come with a CPU cooler, but if your CPU gets too hot, your system will throttle the CPU performance to maintain a reasonable temperature. An aftermarket air, or liquid cooler will ensure maximum performance by dissipating heat more efficiently away from the CPU. The Dark Rock 4 is what I would use if I were building now. You can find it in the parts list below.
Fans:
Airflow is important. Your computer will run faster if the components stay cool. I used a total of 6 fans in my build and I never have any issues with performance throttling due to temperature. Generally having at least a few intake fans and 1 or more exhaust fans is sufficient. When I built a computer for my daughter I was able to use only 3 fans with no thermal issues.
Lighting:
If you want to personalize your build, there are a ton of addressable lighting options you can add. This is purely aesthetic and will make setup a little more complicated.
Plan your build using PC part picker:
Pcpartpicker.com is an amazing resource that lets you build a custom PC part list virtually. It will alert you if there are compatibility issues and it will find the lowest price for each part online. I used it for both computers I built this past year. They also have several builds they recommend, although mainly focused on gaming performance. Below is a link to a build that I would recommend in 2021. Last Fall, new CPUs and GPUs that we released, and if you can get your hands on them, it’s a great time to build a custom PC.
https://pcpartpicker.com/user/Zschnepf/saved/#view=WXjLsY
Purchase parts:
Pcpartpicker.com was invaluable once again when it came time to order all the parts on my list. I only had one problem when it came time to order parts. With so many people being stuck at home working and remote learning, many people decided to buy and build computers this year. Some parts took me weeks to track down and I had to pay a little more than I wanted just to secure the parts. Other than that I had no issues at all.
The Build:
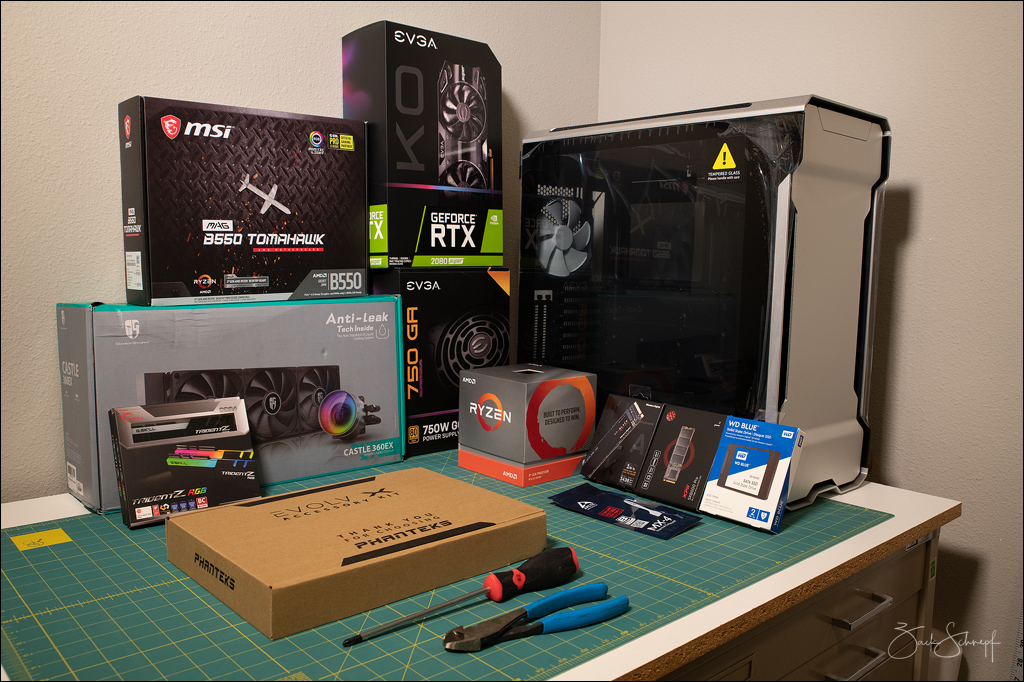
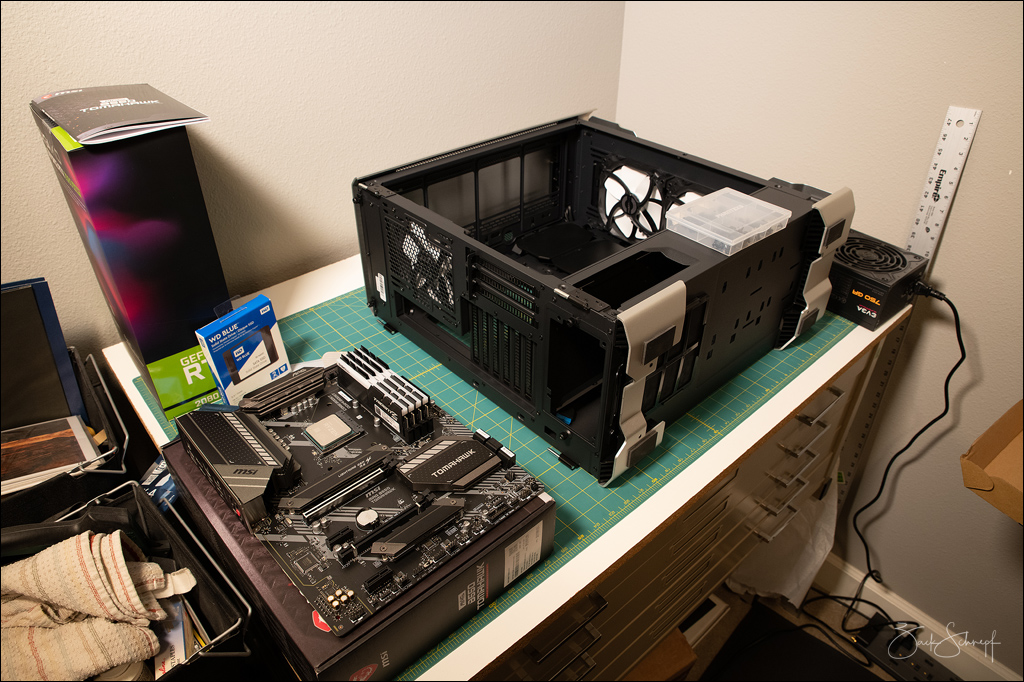
I had a lot of fun researching and learning how to build PCs. There were challenges along the way, but with the help of many YouTube videos and online articles I was able to build my dream editing machine and a computer for my daughter and her remote learning this year. Below is a link to a helpful video walking you through a standard build. I’ve included a few photos from my build as well.
https://www.youtube.com/watch?v=i5jFXl0GZJo&list=PLRnHcRQUxuoeQM4-llcMNXTakKZcAAyB6&index=6
Setup:
This YouTube video will walk you through everything you need to do to setup a new PC after building, including Installing windows from a thumb drive and running updates, setting up the bios and getting the computer up and running.
https://www.youtube.com/watch?v=WXwMbmhCQuY&list=PLRnHcRQUxuoeQM4-llcMNXTakKZcAAyB6&index=5
YouTube Resources:
These are the three YouTube channels that helped me the most.
https://www.youtube.com/c/paulshardware/featured
https://www.youtube.com/user/Jayztwocents
https://www.youtube.com/user/LinusTechTips

Location: Bend, OR
Website: www.zschnepf.com
YouTube: https://www.youtube.com/user/zschnepf77
Instagram: https://www.instagram.com/zackschnepf/
Zack is an award winning photographer specializing in fine art landscape photography and post processing. “Art is in my blood. My father is a well known poster artist and painter. My mom was a painter, and print maker and my brother is an art director at Facebook. Art is a way of life for my family, and I will hopefully pass it on to my children as well.”
“The love of nature is also something that my family and I are passionate about. I’ve been hiking, biking, rock climbing and backpacking since I was little. From an early age, I learned to appreciate the beauty in nature.”
Recent Comments