
In this video tutorial, I show how to use the Darker Color Cloning technique.
Thin edge halos: you may not notice them when viewing an image on-screen, and especially not when sized for social media. However, if you view an image at full resolution you will sometimes find thin white lines or “halos”, most commonly along skylines or other high contrast edges. These edges can become more apparent when adjustments to clarity, sharpening and contrast are made. They become particularly obvious in large prints and do not look good. It is often small missed details like this that can make the difference between a good photograph and a great one.
Edge Halos can be caused in a variety of ways during image developing and unless you are looking for them you may not see them until it is too late. The first line of defense against edge halos is to avoid creating them in the first place.
A common perpetrator of edge halos is exposure blending or sky replacements. Halos can be caused by a poorly constructed blending mask, by the exposure layers being out of alignment due to camera shift or when the light exposure has overexposed edge detail so that portions of the edges are blown out. The first issue can be avoided by constructing a better mask. The second issue can be avoided by making sure all exposures are in proper alignment. This can be done by moving the layers with the move tool or using Photoshop’s Auto-Align feature. The third issue can’t really be avoided so it just needs to be dealt with later.
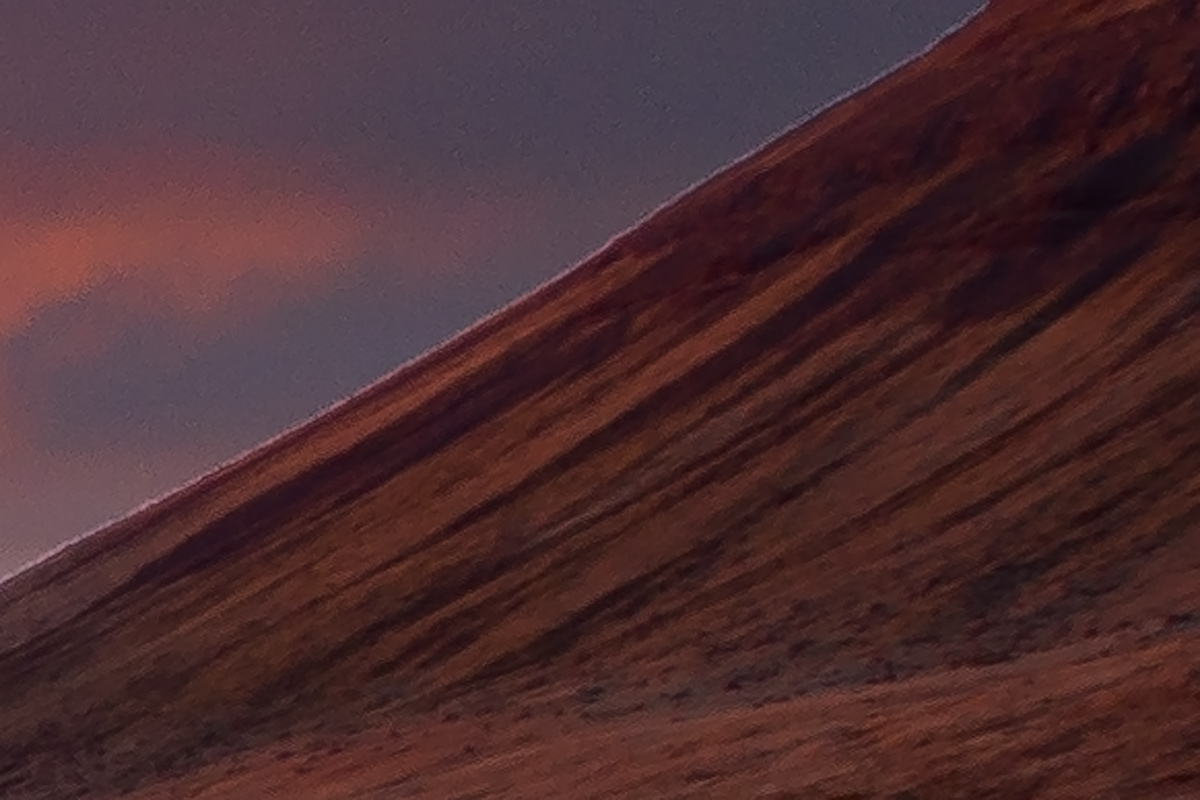
Edge halo left by a misaligned exposure blending mask.
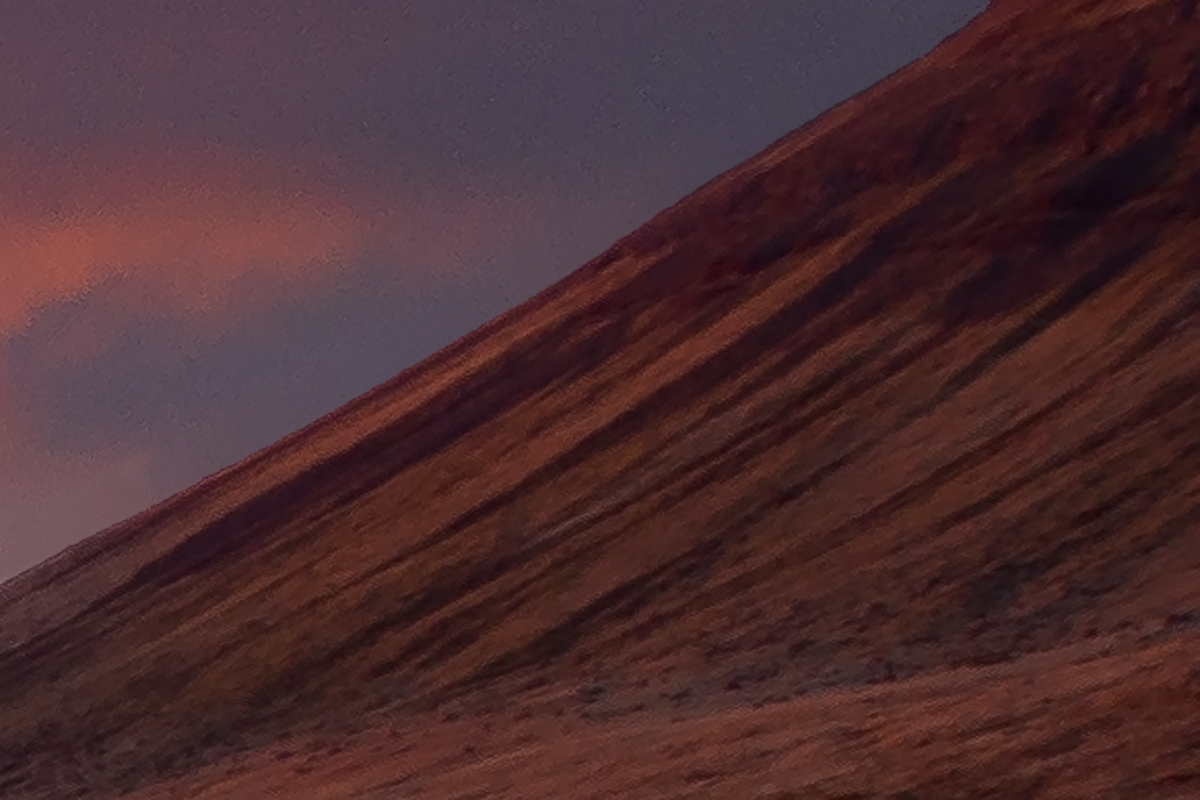
Fixed using the Darker Color Cloning technique.
Perhaps the most common culprit is overzealous use of highlight and shadow recovery in Lightroom or Camera Raw. It is tempting to try to squeeze as much dynamic range as possible out of a raw file by sliding the Highlights slider all the way to the left and the Shadows slider all the way to the right. But doing so usually creates a thin halo along the skyline edges. It may be subtle to begin with, but further raw adjustments for clarity and contrast will make it worse. Clarity and contrast adjustments made in Photoshop will also exacerbate the problem. To avoid this issue try to not make such heavy highlight and shadow recovery adjustments to the raw file, particularly the highlights. Blending two exposures can help, or even just double processing copies of a single raw file, making greater use of the exposure slider than the highlights and shadows sliders and blending the copies.

Edge halo caused by aggressive use of the Highlights recovery slider in Lightroom.

Fixed using the Darker Color Cloning technique.
But let’s assume that, whatever created the halo, it’s too late to avoid it now and you just need a way to fix it. There are of course many ways a thin halo can be dealt with, and I cover a few of them in my Favorite Photoshop Techniques Vol 2 course. But, when it works, a method I call Darker Color Cloning is the quickest and easiest. I learned it from my friend, Glen Parker, so thanks, Glen!
The technique is quite simple. In Photoshop you select the Clone Stamp tool, set it to sample the Current Layer and change the Mode to Darker Color. The Darker Color mode tells the Clone Stamp to use the sampled color to fill in any areas that are a lighter color, but not affect any areas that are a darker color. This allows you to clone along a skyline edge, removing the light halo while not cloning over the edge itself.
To see a demonstration of how to do this technique, watch the video tutorial above.
If you have any questions or suggestions, leave them in the comments section below and I’ll get back to you.

Sean is an outdoor photographer, digital image developing enthusiast and photography educator based in Ashland, Oregon, where he resides with his wife and two sons. His previous career as a science teacher makes photography education a good fit. Sean teams up with fellow Photo Cascadia members leading workshops. He also teaches digital image developing classes, lectures and offers a series of Photoshop video tutorials.
More posts by Sean Visit Sean’s Image Gallery Visit Sean’s Website
Recent Comments