
The circular polarizer (cpl) is one of the most useful tools in landscape photography in my opinion (FYI – I use Breakthrough Photography filters and I am one of their ambassadors but this is not sponsored content). By blocking scattered light waves a polarizer helps the camera record the actual color, luminosity and contrast of objects in the scene, including darker skies, seeing through reflections and bringing out the colors of leaves, wet rocks and other shiny surfaces.
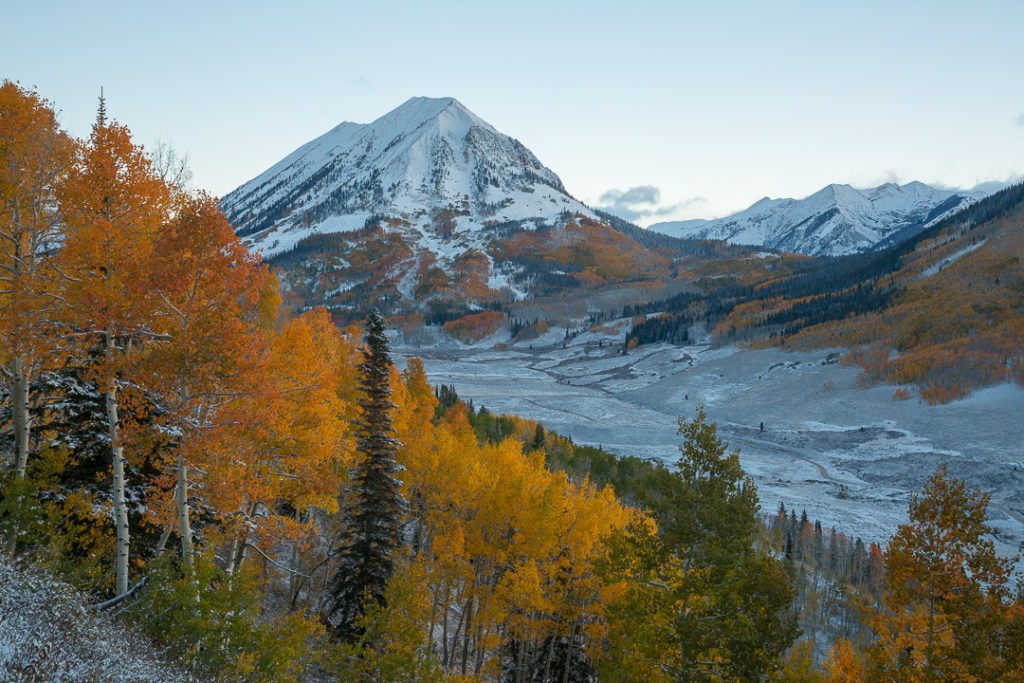
A common challenge landscape photographers face is using a polarizer with a wide angle lens. In the sky, maximum polarization occurs at a 90-degree angle from the sun and then it fades off in either direction. With wide angle lenses, the view of the lens is wider than the polarized area of the sky, so resulting images often have an unnatural blob of polarized sky in the middle which fades lighter towards the edges of the frame.
There are some traditional workarounds for this problem. One is to use a longer focal length so that only the darker portion of the sky is in the frame. Another is to rotate the polarizer to back off the amount of polarization in the sky. A third is to do some sort of sky replacement technique in Photoshop to replace the polarized sky with a more natural looking sky. But all of these solutions have downsides.
If you have deliberately chosen to compose a wide angle landscape then using a longer focal length isn’t a good option.
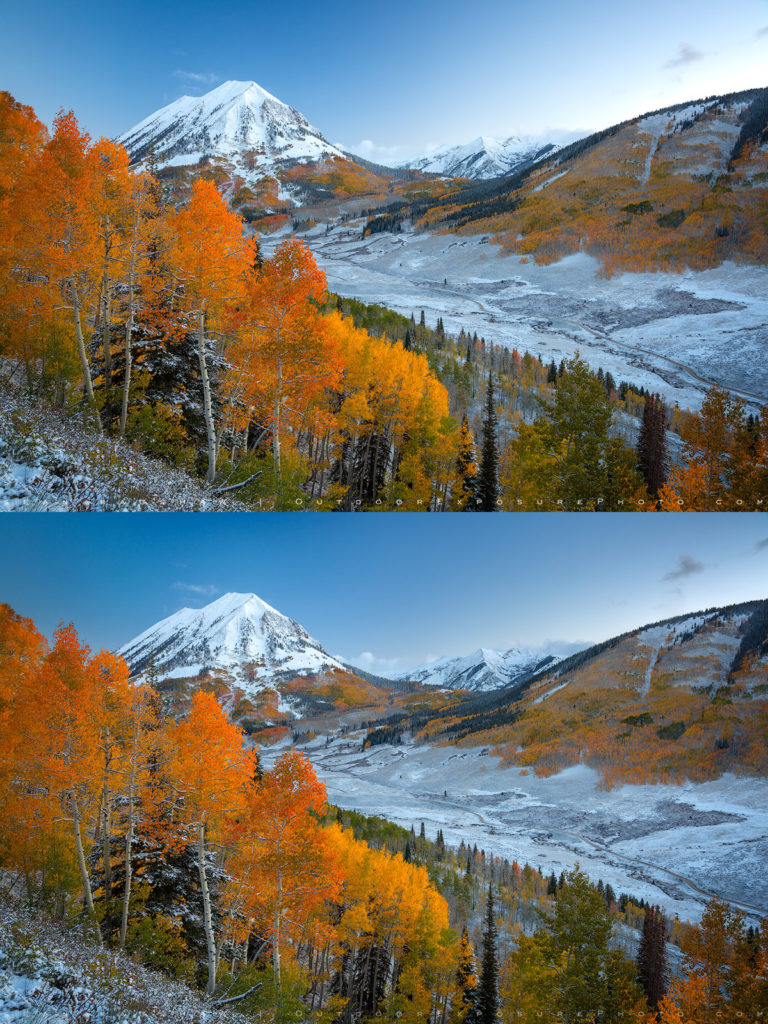
If you rotate the polarizer to lessen the effect in the sky it also diminishes the benefit the polarizer was having on the plants, water and landscape, as is illustrated by the photo below.
Completely replacing the polarized sky may not be a good option for a variety of reasons. For many photographers, swapping out skies is something to be avoided on principle. Even if you are OK with replacing a sky, accomplishing it in a way that looks natural and undetectable can be challenging. Finally, as was the case with this scene, I really liked how the deep blue sky that was actually there contrasted with the bright orange and yellow aspen trees.
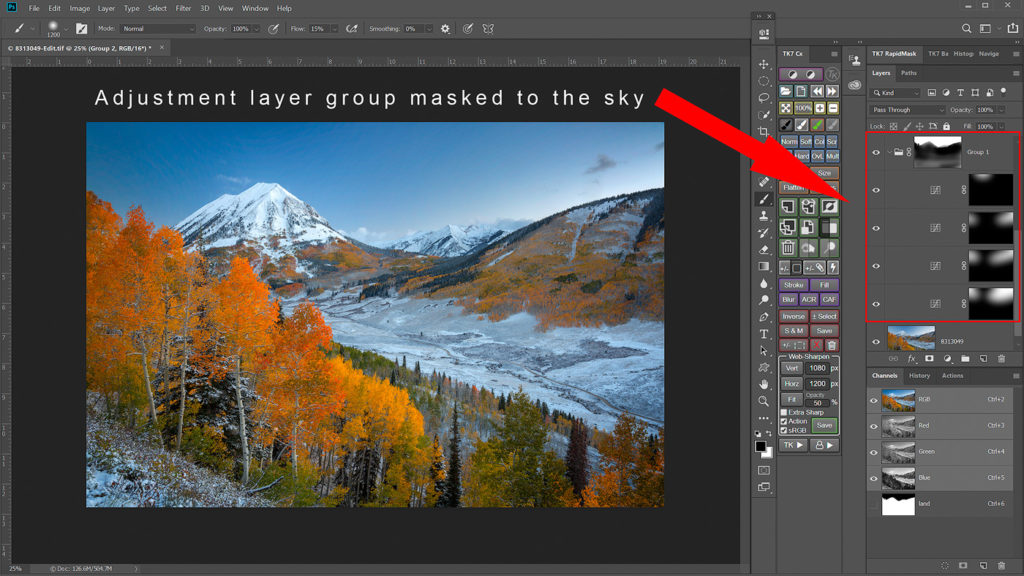
In the following video, I demonstrate a Photoshop technique for smoothing out “polarizer sky” that gives you an additional option when confronted with this challenge. It allows you to maintain your wide focal length, get the maximum benefit of the polarizer and also retain the actual sky color and light that you experienced.
I give a detailed demonstration of how to create darkening adjustment layers with feathered masks to smooth out the sky tones and then add these to a group with a landscape mask to restrict the adjustments just to the sky.
This is a common issue for landscape photographers and something that I was frustrated by for years. After trying many different approaches, this is the one I settled on that I feel gives the best results. I hope you can put it to use and it allows you to get the benefits of a polarizer even when using a wide angle lens. If you have any questions or suggestions leave me a comment below or in the video comments on YouTube.

Sean is an outdoor photographer, digital image developing enthusiast and photography educator based in Ashland, Oregon, where he resides with his wife and two sons. His previous career as a science teacher makes photography education a good fit. Sean teams up with fellow Photo Cascadia members leading workshops. He also teaches digital image developing classes, lectures and offers a series of Photoshop video tutorials.
More posts by Sean Visit Sean’s Image Gallery Visit Sean’s Website
Recent Comments