By Sean Bagshaw
Recently, through my own pondering and in reading the musings of other photographers, I have been energized by the idea that digital image processing is less of a revolution and more of a return to photography’s roots. Photographers in the golden era approached their craft in two separate but interwoven creative arenas, camera technique and darkroom processing. Then photography went through a 30 to 40 year period where color 35mm film was popular. While this format offered many advances, few people did their own developing and in the case of slide film, very little creative processing was even possible. As a result, the creative focus in photography shifted almost entirely to camera technique. While camera technique is still every bit as important as it ever was, the advent of digital imaging and processing has allowed photographers to get back in the “darkroom” and be reintroduced the artistry of developing an image.
As with any art or craft there is much to know and learn to become a master of the digital darkroom. Acquiring the skills to produce fine art images that meet the highest standards of quality and artistry is no simple task. Because it is possible for anyone with a computer and the right software to begin digitally developing their images and because there is no cost penalty for experimentation, many people teach themselves a somewhat haphazard and pixel destructive approach to their processing. It can be exhilarating to just let it flow and experiment, building up one adjustment on top of another in the hopes that something magical will happen along the way. Sometimes happy accidents do occur with this approach, but more often we end up backing ourselves into a corner with aggressive adjustments that have compromised the quality of our image leaving no way to reverse the damage or take a different path without starting from scratch. When something good does happen we often have no way to retrace our steps and reproduce what we’ve done. But we also don’t want to reduce image developing to a rigid set of cooky cutter steps that strips it of any creative and artistic serendipity. The best of both can be achieved by learning how to employ non-destructive techniques in your image processing workflow.
A workflow is a framework or guiding philosophy that informs and directs how the artist works on his or her images, and for most of us that involves Photoshop. A workflow founded on non-destructive techniques is one that allows the photographer to make adjustments to an image in a way that produces the best quality final output while also being very flexible, fine tunable and reversible. My friend, Mac Holbert, a pioneer of digital processing and printing, and his frequent teaching partner, John Paul Caponigro, have done a lot to develop and promote best practices for a non-destructive workflow. Their video series on the topic is superb. I have also recently released a video tutorial series that teaches my non-destructive workflow.
Why is working non-destructively important? Often times image adjustments introduce small compromises to image quality in the forms of noise, artifacts, banding and halos to name just a few. In the course of working with an image those small compromises in quality can accumulate and become problematic. Other times we just screw up or make poor developing choices. When adjustments are made directly to the pixels of an image it is not possible to come back in the future and fix the issue or even know which adjustment or combination of adjustments caused the problem. Additionally, it is always valuable to be able to fine tune your adjustments in the future even if they aren’t causing problems with quality. I often work on images over a period of days and I regularly make minor alterations to my processing over months and years. As I learn new techniques, improve my skills or have new creative inspiration I find that I will often go back to my adjusted images and make both minor and major changes. As technology evolves it is also essential to be able to adjust images to take advantage of improved capabilities. For example, as printers, inks and print media get better the ability to go back and re-adjust color, contrast and sharpness to take advantage of the advances is much preferable to reprocessing entire images from scratch. None of these things are possible if all of the original processing you did is permanently cooked into the pixels of a single layer image file.
Below I outline some of the basic tenets and techniques of a non-destructive fine art digital image processing workflow. For those interested in getting the most creative flexibility, reproducibility and quality from your developing and are not yet familiar with how to achieve non-destructive image adjustments in Photoshop I encourage you to begin working these concepts into your process and search out additional information and instruction if needed.
Some Basic Concepts Of A non-destructive Workflow
- Capture and retain as much image information as possible
- Use raw capture in camera
- Consider opening raw files into Photoshop as smart objects so it is possible to re adjust raw settings in the future. This also makes it possible to take advantage of future improvements in raw software such as the improved noise reduction recently added to Adobe Camera Raw.
- Open and work with raw files as 16 bit files using the ProPhoto color space to retain as much image data as possible. Avoid making major raw adjustments that you might have to try to reverse later in Photoshop.
- Save working and mastered image files as .psd or .tif files with all layers intact.
- Make as many of your adjustments as possible using adjustment layers instead of making adjustments directly on a pixel layer.
- Avoid adjustments and tools that only work on pixel layers when possible.
- When it is necessary to make adjustments to the image (pixel) layer itself, duplicate the background layer and make adjustments to the copied layer.
- Keep layers that contain pixels at the bottom of your layer stack so they don’t block adjustments from above or below.
- Use layer masks in combination with adjustment layers to target adjustments to localized areas of an image.
- Be aware that use of plug-in filters with Photoshop, like those from Nik, are destructive, meaning that they create a new pixel layer with all previous adjustments stamped into it. This takes away the ability to go back and tweak adjustments below the filter layer in the future. If you create plug-in filter layers as smart objects you can at least go back into the plug-in software and alter those adjustments in the future.
- Don’t flatten as you go. There are good techniques for creating organized, labeled layer stacks that don’t require flattening. As soon as you flatten layers you lose the ability to fine tune previous adjustments, correct mistakes or reverse harmful adjustments. If you have worked yourself into a corner where flattening is the only option then you did not organize your adjustment layers correctly somewhere along the way.
What Does My Basic Non-destructive Workflow Look Like?
- First I make careful raw adjustments in Lightroom or Camera Raw to prepare the file for Photoshop. Some adjustments such as initial shadow and highlight control and setting basic white balance as well as noise and chromatic aberration reduction are best done with the raw file.
- Then I open the image in Photoshop as a 16bit file in the ProPhoto color space.
- I make all adjustments that directly affect pixels first, including spot cleanup, cloning, horizon alignment, perspective transformations, minor cropping and adjustments that can only be made on a pixel layer (such as shadow/highlights).
- Using adjustment layers I make global color and contrast adjustments to correct unwanted color casts and precisely set proper black and white points.
- As needed I use adjustment layers, blending modes and layer masks to make regional adjustments for color, contrast, luminosity, light balance, shadow and highlight detail, dodging and burning, etc.
- Still using adjustment layers, blending modes and layer masks I make any targeted/localized adjustments to saturation and luminosity or add any creative treatments such as vignettes or localized sharpening or blurring.
- I evaluate the entire image carefully and go back through the layer stack to fine tune adjustments as needed.
- If I decide to employ any plug-in filters I do this at the end of the process and at the top of the layer stack knowing that I will not be able to make further adjustments to the layers below unless I delete the plug-in filter layers, make adjustments and then re create the filters.
- The working master file is always saved as a 16 bit .psd file with all layers intact. To output an image for printing or for web preparation I create a copy of the master file and make all sizing, color space, bit depth, soft proofing and sharpening changes to the copy. The output copy can be saved as a jpeg or any other appropriate file type depending on the output.
This is a quick and general overview of the concept of non-destructive image processing, but I hope it gives you some food for thought or at least a starting point for further exploration. I teach an eight hour class that does a more complete job of demonstrating and teaching these concepts. The next time I will be offering this class is April 9th, 2011 at the Cascade Center Of Photography in Bend, Oregon. My video tutorial series, Digital Processing Workflow For Nature Photographers contains over four hours of instruction and is available for purchase from my website.
I’d love to hear your feedback on this topic so please leave a comment, share questions you have, problems you run into or non-destructive techniques that you find effective.

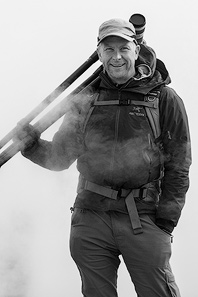
Sean is an outdoor photographer, digital image developing enthusiast and photography educator based in Ashland, Oregon, where he resides with his wife and two sons. His previous career as a science teacher makes photography education a good fit. Sean teams up with fellow Photo Cascadia members leading workshops. He also teaches digital image developing classes, lectures and offers a series of Photoshop video tutorials.
More posts by Sean Visit Sean’s Image Gallery Visit Sean’s Website


Recent Comments