 Fireworks are not what most of us here at PhotoCascadia normally spend our time photographing. However, a technique I recently learned is so much fun and creates such magical and whimsical images that I just have to share it. I first found out about the technique, called fireworks focus blur, from the blog of Portland photographer, Gregg Kerber. In the last year or two this technique has really taken off in popularity. To see what I mean just do a search for “fireworks focus blur” on Google Images or Flickr. As you can see from my images and those of others, the results are beautiful, impressionistic and captivating.
To try out this technique you will need a few things including a tripod, a camera with manual shutter speed and aperture controls and a lens with a manual focus ring. Any of the current digital SLR cameras will meet these criteria. Most importantly you need fireworks. If you live at Disney World you could photograph fireworks every night of the year if you wanted, but most of us will need to wait until the 4th of July, New Year’s Eve or a glam rock band reunion concert.
Find a good location with a clear view of the fireworks. It is best to be close enough to them that they will appear in the sky above you. If you are far enough away, or on a hill above them, they might overlap with buildings and street lights.
The basic concept is actually very simple, but getting the timing right can be a challenge. The short version of the instructions is to simply twist the focus ring during a one to two second exposure. For some folks, that will be all the information needed to get you started.
For those who would like a little more guidance, here is a quick list of equipment, settings and instructions.
- Set up your camera on a sturdy tripod.
- Set the ISO to 100 for the cleanest images. Fireworks are plenty bright so you will not need to use a high ISO.
- With the camera in Manual mode start with an exposure time of one second but be ready to experiment with longer and shorter shutter speeds (1/2 second to three seconds).
- Start with an aperture of f/8 or so. Depth of field isn’t an important consideration with this technique so shutter speed and overall exposure is more important than aperture.
- When the fireworks begin, try taking a few standard in focus images to make sure that you have them in the frame and to determine where the sharp focus point is on your lens (it will be somewhere close to the infinity mark depending on the lens and how far away the fireworks are). Remember where that focused position of the focus ring is.
- Once you have this all sorted out you are ready to try a focus blur. Start by rotating the focus ring on the lens out of focus, all the way to the closest focal point. This will completely de-focus or blur the scene.
- Try to time your shutter release to as close to the moment of the explosion as possible. You can listen for the launch boom and also watch for the tracers of the fireworks rocketing upward. To make releasing the shutter easier and more precise it can be very helpful to use a cable release.
- Just after you press the shutter release begin smoothly rotating the focus ring back to your predetermined focus point. If you go past it that’s OK, you just won’t have perfectly sharp endpoints on your fireworks.
- If the fireworks are underexposed or overexposed you can compensate the exposure by opening the aperture ( f/5.6) or closing down the aperture (f/11).
- You can experiment with different combinations of shutter speed and focus speed. It’s important to time your move from out of focus to in focus to occur during the period of time that the shutter is open. The focusing motion with a one second exposure will need to be twice as fast as with a two second exposure.
- Expect to have a lot of throw away images. You won’t time the shutter release and focus pull just right every time and unless you are shooting pretty wide there is a good chance that some of the fireworks will also be outside of your frame.
- Once you have these basics figured out you can try some other experiments. Try reversing the focus pull, beginning in focus and then going out of focus. Instead of thick bursts that narrow to a point you will create thin bursts that get fatter towards their ends. You can also try rotating your focus ring back and forth multiple times to create all kinds of effects.
- It is also fun to experiment with different lenses if you have enough time. Going wider or more telephoto will change how much of the frame is filled and how compressed the blur is. Different lenses also have different focal ranges and blade patterns which will have an affect on how the images will look.
If you don’t have a chance to photograph fireworks for a while you can bookmark this article and return to it later. You also might want to try this technique with carnival rides at the summer fair or sparks coming out of a campfire. Have fun and let us know how it goes!
You can see more of Sean’s work and find out about his classes, tours and Photoshop tutorials at www.OutdoorExposurePhoto.com.

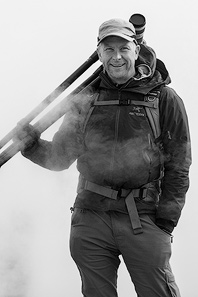
Sean is an outdoor photographer, digital image developing enthusiast and photography educator based in Ashland, Oregon, where he resides with his wife and two sons. His previous career as a science teacher makes photography education a good fit. Sean teams up with fellow Photo Cascadia members leading workshops. He also teaches digital image developing classes, lectures and offers a series of Photoshop video tutorials.
More posts by Sean Visit Sean’s Image Gallery Visit Sean’s Website


Recent Comments