What Are The Northern Lights And Why Do They Happen
* The most important thing when trying to predict Aurora is looking at the KP index on a scale from 1 to 9 in terms of geomagnetic strength
* Aurora Service Or Aurora App that have Aurora alerts.. www.aurora-service.org, Also check sites for weather like yr.no to follow the weather.
* Northern Lights caused by plasma reaching the earth from the sun. So when we detect charged particle activity on the sun it reaches the earth three days later. This is how scientists predict Northern lights and why we get a three-day forecast.
* So when the charged particles bombard the atmosphere with magnetic activity we see the lights at latitude 69 or 70 degrees.
* The three important concepts when looking at northern lights are the solar activity, solar wind, and the Earth’s magnetic field.
When and Where To Go
* Best times to go are from November-March.
* We seem them in polar latitudes around 69 or 68 degrees north.
* Good locations are Lofoten Islands, Northern Canada, Russia, Finland, Sweden, Iceland, and of course Alaska.
* You have the best probability of seeing the lights in the months of January, February and March.
* It is important to be very patient as many of these places can have many days of storms and cloudy weather.
Settings On Camera, Composition And Planning
* When photographing Northern lights its important to know your camera and settings for the situation.
* Because it’s very exciting to see the Northern lights for the first time it’s very common and normal to get overexcited. So the goal is to be able to resort to some pre-planned settings.
* Look for the lights to appear to the north of you and above you.
* Sometimes they become so strong that they do appear in some southern latitudes.
* So when scouting, plan for compositions that face to the north
* Most people forget composition when they first see the lights. Don’t only photography the sky. Try to include foreground, midground, and background.
* Try to give it some context. Tell a story with your images.
* Be careful of what’s called false exposure as your eyes get used to the dark and you start to adjust your exposure based on your LCD. The images look perfectly exposed in the dark but later when we process they are too dark.
* Always check your histogram and make sure you have information to the right of the camera – this is very important
* Try light painting with a flashlight to expose the foreground if you are by yourself’
* Highlight with a flashlight from the side. This achieves some depth and shadows.
* When the moon is full the landscape is nice but much harder to get detail in the lights.
* The best situation is a 20-30% moon so you get a bit of light on the landscape but you can still get details in the lights and also get stars in the image.
* Try including a person in the image as it provides perspective and mood. Also, it helps if the viewer can imagine they are in the scene watching the lights. It helps if the subject is looking at the lights or has a headlamp on. This really helps people connect with he image.
* Add another dimension by looking for reflections or water such as a river and creeks. Make sure to get a low angle to include the lights and color in reflection.
* Panos can be achieved but there has to be very little movement in the lights.
* Pano Verticals work well so you can get all of the lights and a strong foreground. This is a great way to have one exposure for the foreground and another for the sky.
* Make sure to look for patterns and textures in the foreground. For example, I will look for ripples in the snow that lead towards the lights. If I am photographing a subject in the foreground I will use its shape to be pointing towards the lights.
* Look for shapes in the landscape that mimic the northern lights.
Equipment
* A good camera with a sensor that is higher quality that offers a good dynamic range is always a great start when photographing lights.
* Some of the best cameras for photographing Northern lights are Nikon D850/800 Series and the Sony A7 Series. The Canon 5D Mark IV does a great job as well.
* Having a wide-angle lens with at least f/2.8 is helpful.
* F/4 makes shooting lights very difficult as the shutter speeds needed to achieve the same exposure as a 2.8 is too long
* The biggest challenge when shooting northern lights is the focus:
It’s important to always review your images by zooming in on the stars and landscape subjects and checking for sharpness.
How to Focus In The Dark
* Focus in Live View and enlarge an area that has stars. Move focus ring to make the star a perfect dot.
* Infinity is not really infinity, but optical infinity, so for most lenses the infinity is slightly off the camera’s infinity mark.
* Remember the exact position of focus on the focusing ring to reset your focus in the future.
* You can tape the lens at the point of focus so the focus doesn’t get bumped.
Settings on Camera
Settings for your camera will always be based on the intensity of the lights as well as movement. Generally if the lights are moving quick and strong I try to keep my exposures under 10 seconds. If they are very faint on a moonless night I’ll be closer to 30 seconds. I will describe if you a few different scenes and the settings I use
Moonless Night and Lights Are Low
ISO 2000 – ISO 3200
20-30 Seconds
2.8
Full Moon
If lights are intense good for landscape
ISO 800
10 Seconds
F/4
(If including a separate exposure for foreground)
ISO 1250
30 Seconds
F/9
Strong Northern Lights and Moving Fast
ISO 1600- ISO 2500
8-10 Seconds
F/2.8
Processing in Camera Raw/Lightroom and Photoshop
* Shift the color temperature and tint to the cooler temperatures so more blues and green. It reflects the mood and story you are trying to convey with your images.
* Increase the exposure.
* Use the orange HSL slider to reduce light pollution. You only want green blue and white tones.
* Decrease Saturation a tiny bit.
* Add clarity and contrast for sky and lights with a graduated filter in LR/ACR.
* Decrease highlights in areas that might get blown out’
* Hue/Saturation – decrease vibrancy and saturation In snow and trees.
* Color Balance – Shift towards the blues
* Add a curves adjustment to the northern lights to add more clarity and contrast only in the lights with radial filter
* Bring out the highlights using luminosity masks.
* Try applying some Orton glow and te3xture in the foreground by way of a high-pass filter.

Website: www.kevinmcnealphotography.com
Facebook: https://www.facebook.com/kevinmcneal30
Instagram: www.instagram.com/kevinmcneal30
Flickr: https://www.flickr.com/photos/kevinmcneal
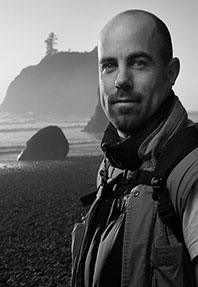
Kevin McNeal is a landscape photographer who resides in the Pacific Northwest of the U.S. He focuses on grand colorful landscapes that reflect the most unique places on earth. Capturing moments of magic light and transferring this on print, images behold a combination of perseverance, patience, and dedication to capture the images in ways unseen before. The stories of how these images are rendered come across in the feelings the images convey.


Recent Comments