
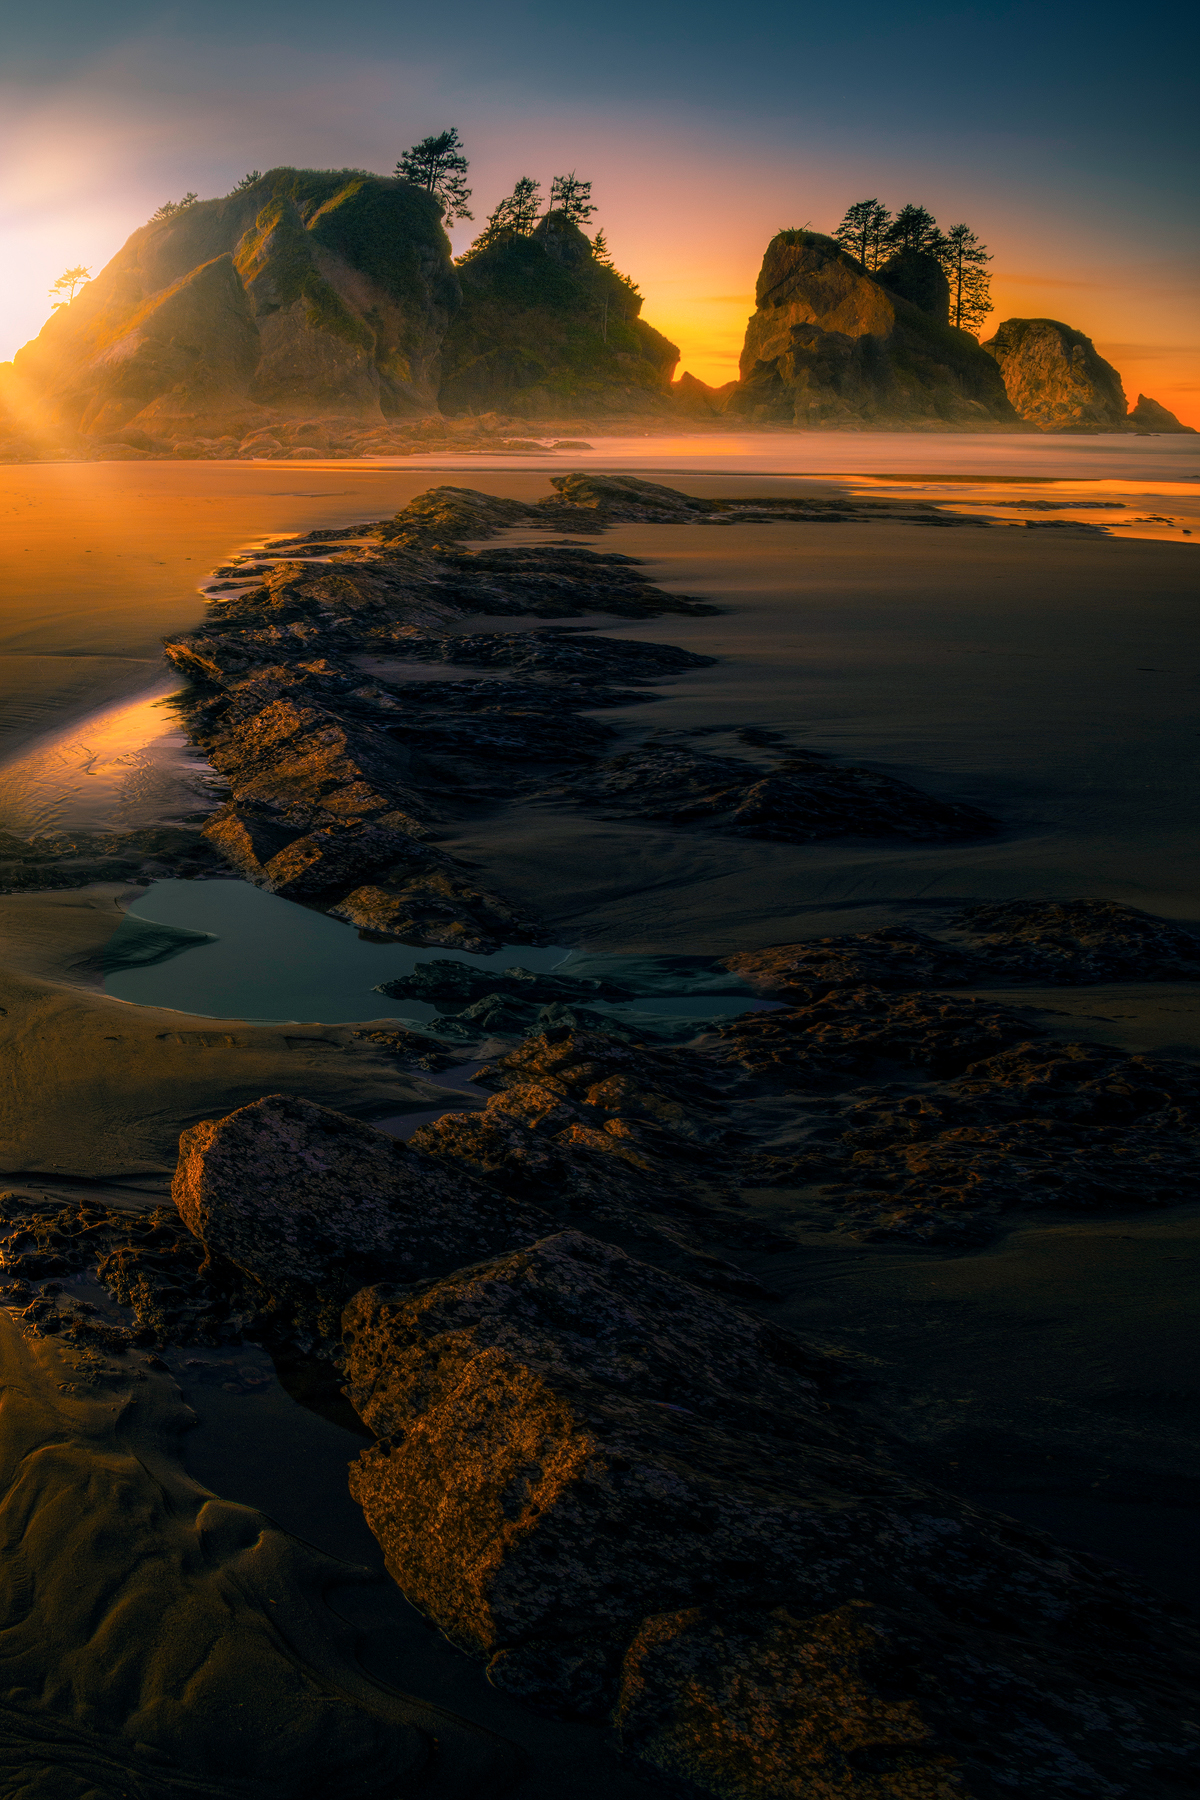
Using Foreground Elements To Lead The Viewer To The Subject
Photographing oceans has been steadily growing with landscape enthusiasts. The energy and power of the water attracts all kind of photographers. The possibilities of different moods and styles are infinite.
With each passing group, ocean images get better and more creative. The constant moving elements challenge the photographer to move with the dynamics of the ocean. The goal is to capture just the right moment. The increased interest in photographing oceans and beaches is now known as ‘oceanscapes.’
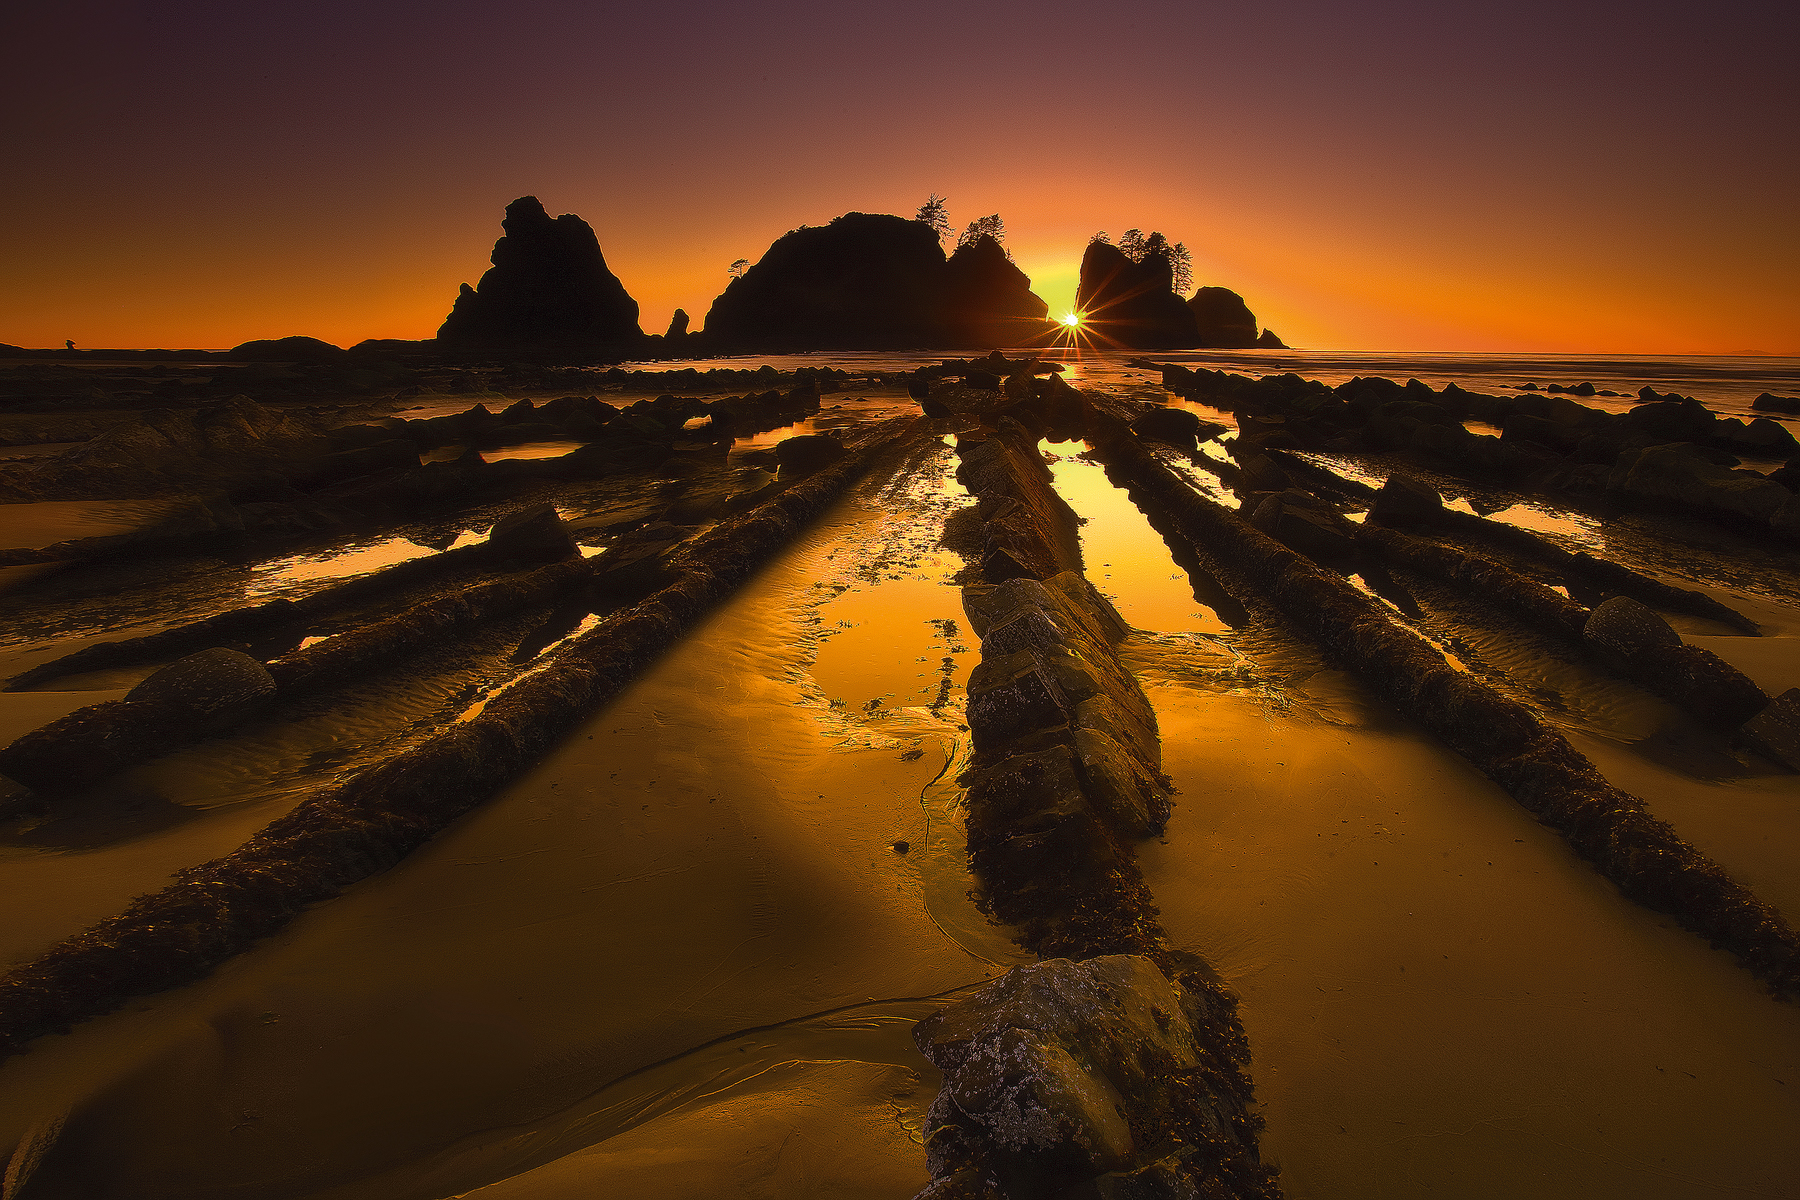
Using a pattern of rocks that repeat themselves into the distance to create depth
I began my photography career 13 years ago shooting the beaches of the Olympic Peninsula and Oregon Coast. There was something about both places that kept me in enthralled with the location and mystery of the water.
Over the years I made many mistakes in all areas of the. Genre and through constant trial and error I continue to get better slowly. Through the process, I choose to take notes and implement different methods to try and add impact to my images. This article discusses some of the more essential tips and tricks I have learned through experience. I am hoping these past experiences that might help other photographers in my position when I began. I will discuss the main areas of ‘oceanscapes’ which are preparation, equipment, compositions, and in-camera techniques.
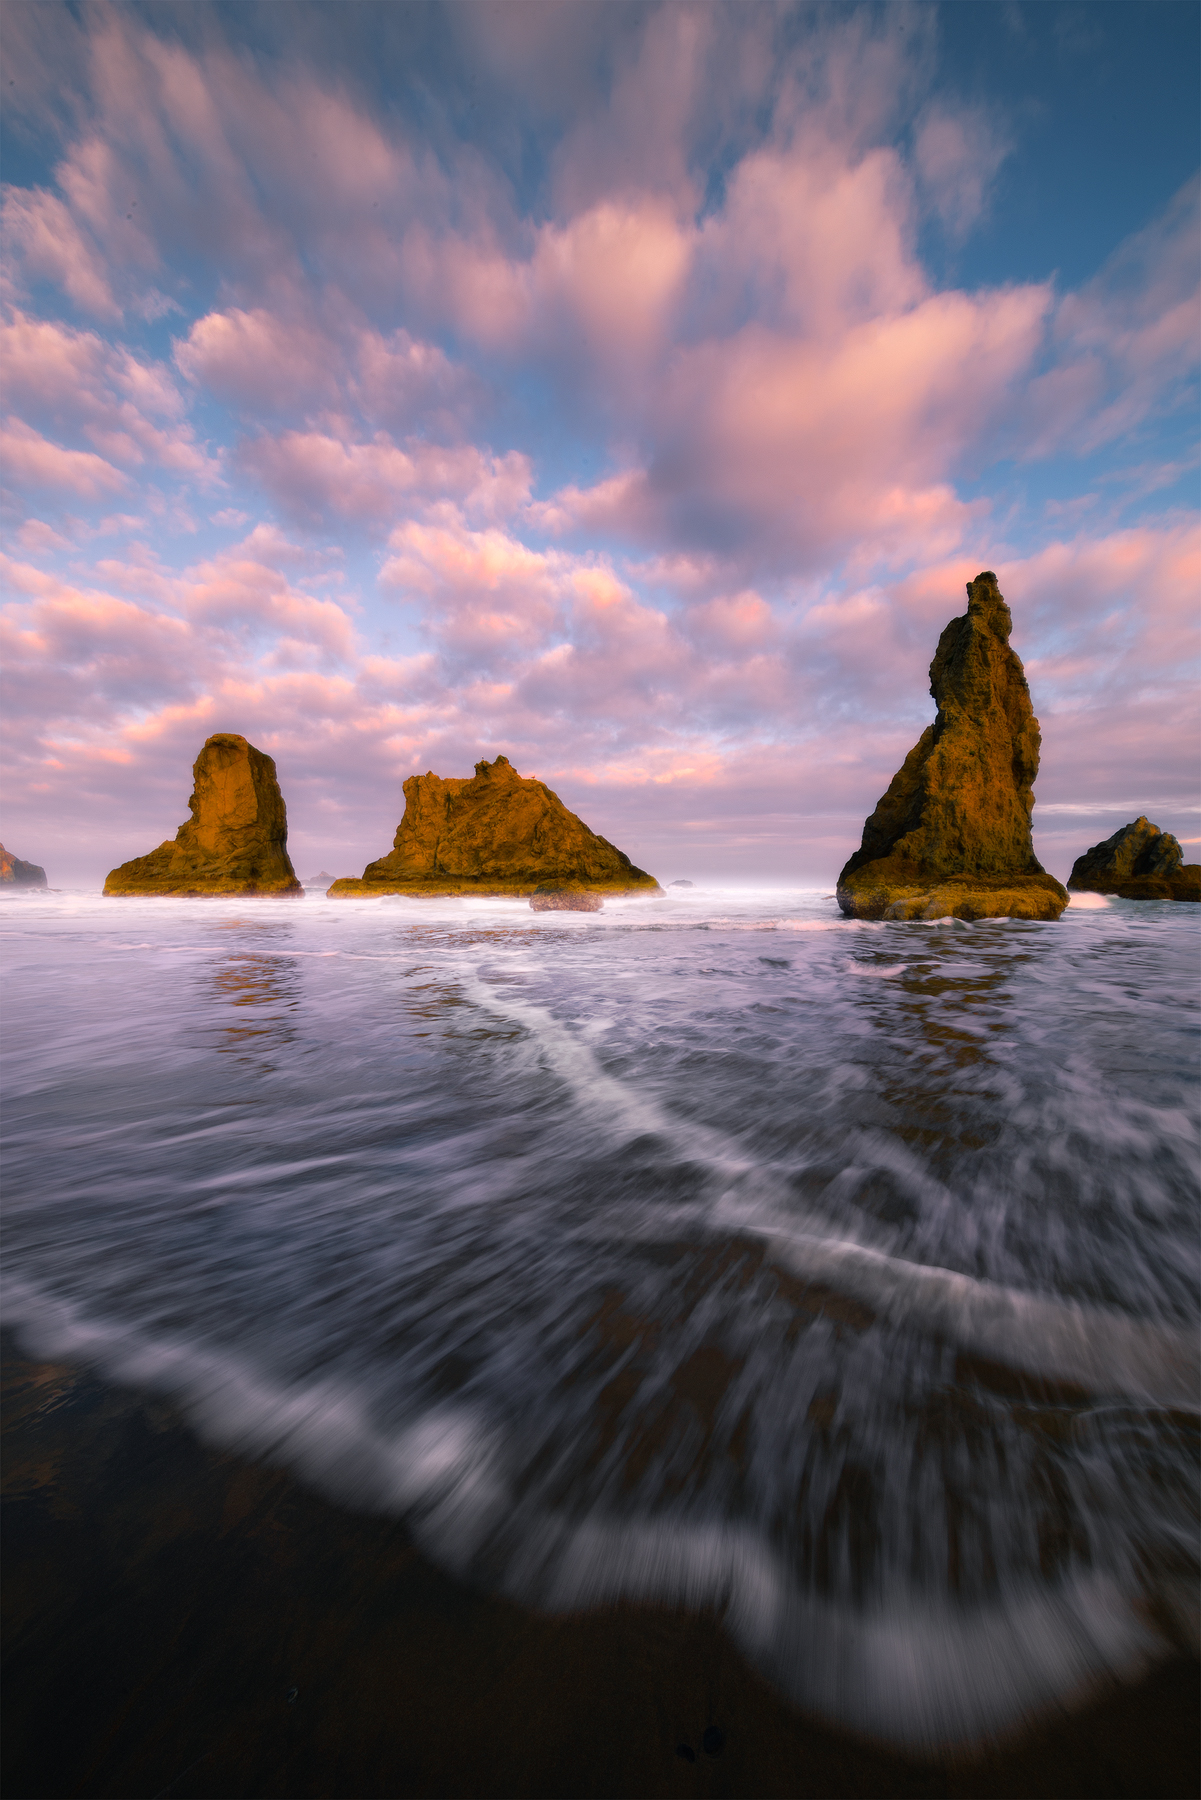
Create a dynamic powerful image by using the rushing waves
Firstly, the process of taking better photos of “oceanscapes’ is learning to be prepared. Being at the right place at the right time. Before I photograph a particular location, I will research the area on the internet. I look for different places to shoot, times of the tides, and possible compositions. One source I always use is Google Earth Pro. It’s important to use the pro version to allow access to all its features — this a great area to get a feel for the whole area. Many of the beaches can be very long and too much area to explore in person. Google Earth Pro can allow me to see the best areas to be. Within the application, you can set a time and date to get a better idea of what to expect. The application includes times for tides, sunrises, sunsets, and even where the moon and milky way will be. Learning about all the benefits of Google Earth Pro puts me at the best place at that location. I also like to use Photo Pills and Photographer’s Ephemeris which are apps that can be applicable on a computer desktop or iPhone/Android app. These are applications similar to Google Earth Pro that can assist in location research as well as where the sun will rise and set. To be more specific it helps you plan where to located and where the light will fall on the land. Like the other applications, it also works with night skies and the milky way. The benefit of having these apps on your phone is that you can have instant access to this information at the location. All applications are well worth your time to learn.
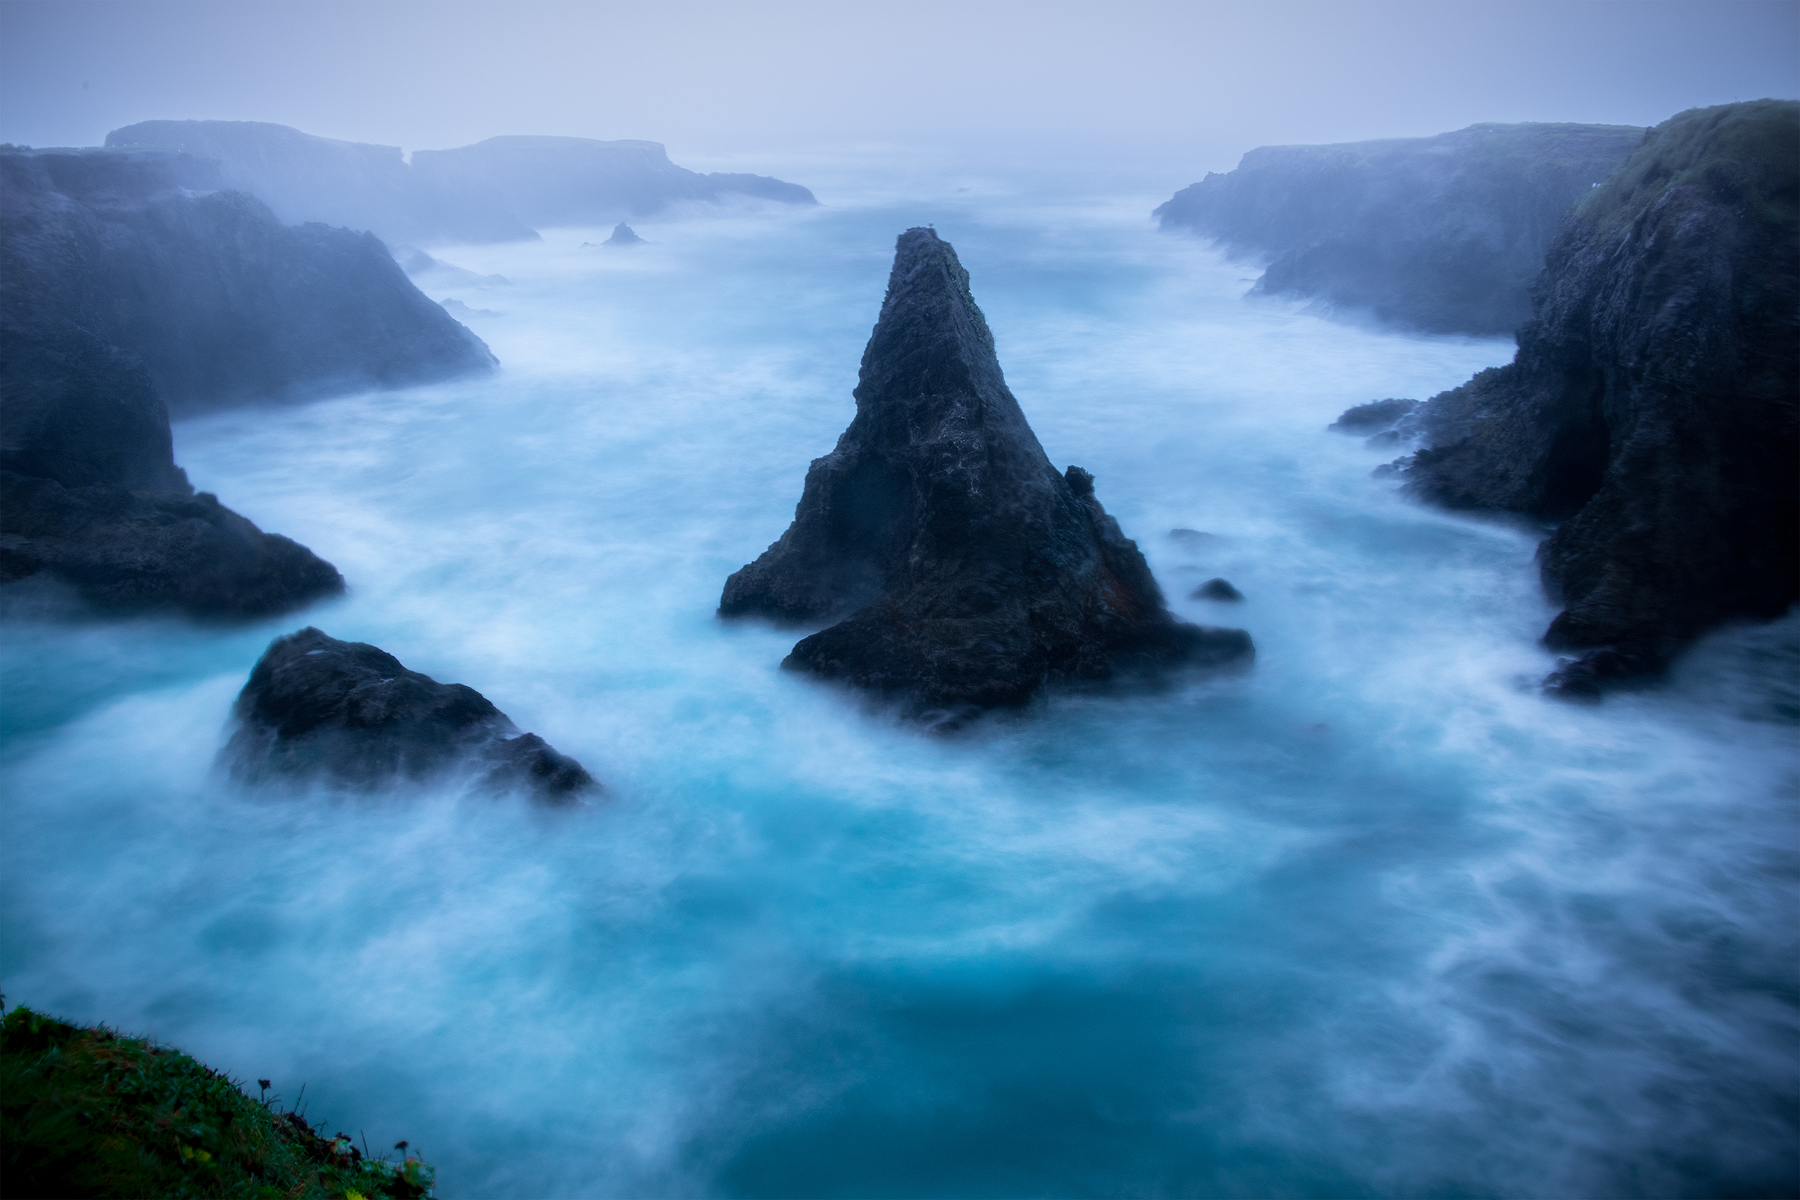
Create a more peaceful mood to the image with long exposures
Another area of research I like to do beforehand is scout on the internet different compositions from other photographers. A good beginning place to start is photo forums like 500px, Flickr, and NPN. These photo forums host many excellent photographers who have similar goals in mind as I do. It’s a good bet that the images on these sites are a good source of the best places to be. It’s important to note that I don’t look at other photographers work to copy compositions but to give me an excellent place to start.
It helps me start to plan out ideas on how can I expand on previous compositions and how I can create something different.
The next important concept that can allow you to capture the best images of “oceanscapes’ is to have the right equipment. Having the right equipment includes not only your camera equipment but other areas like your clothing and protective gear.
I begin with clothing wear because without the right clothes your time can quickly become miserable. I recommend purchasing chest waders to give you the best dry experience. I don’t recommend knee-high boots or waterproof shoes. The reason for this is simple. Too many times rogue waves have come out of nowhere not allowing me enough time to escape. My experience with knee-high boots has been more of a hassle than anything else; this is because the water rises above my boots and then fills with water making it heavy and awkard to move around. I strongly encourage to go all the way in and buy the chest waders (yes, the ones that fisherman use).They are straightforward to put on and off and will keep you a hundred percent dry.
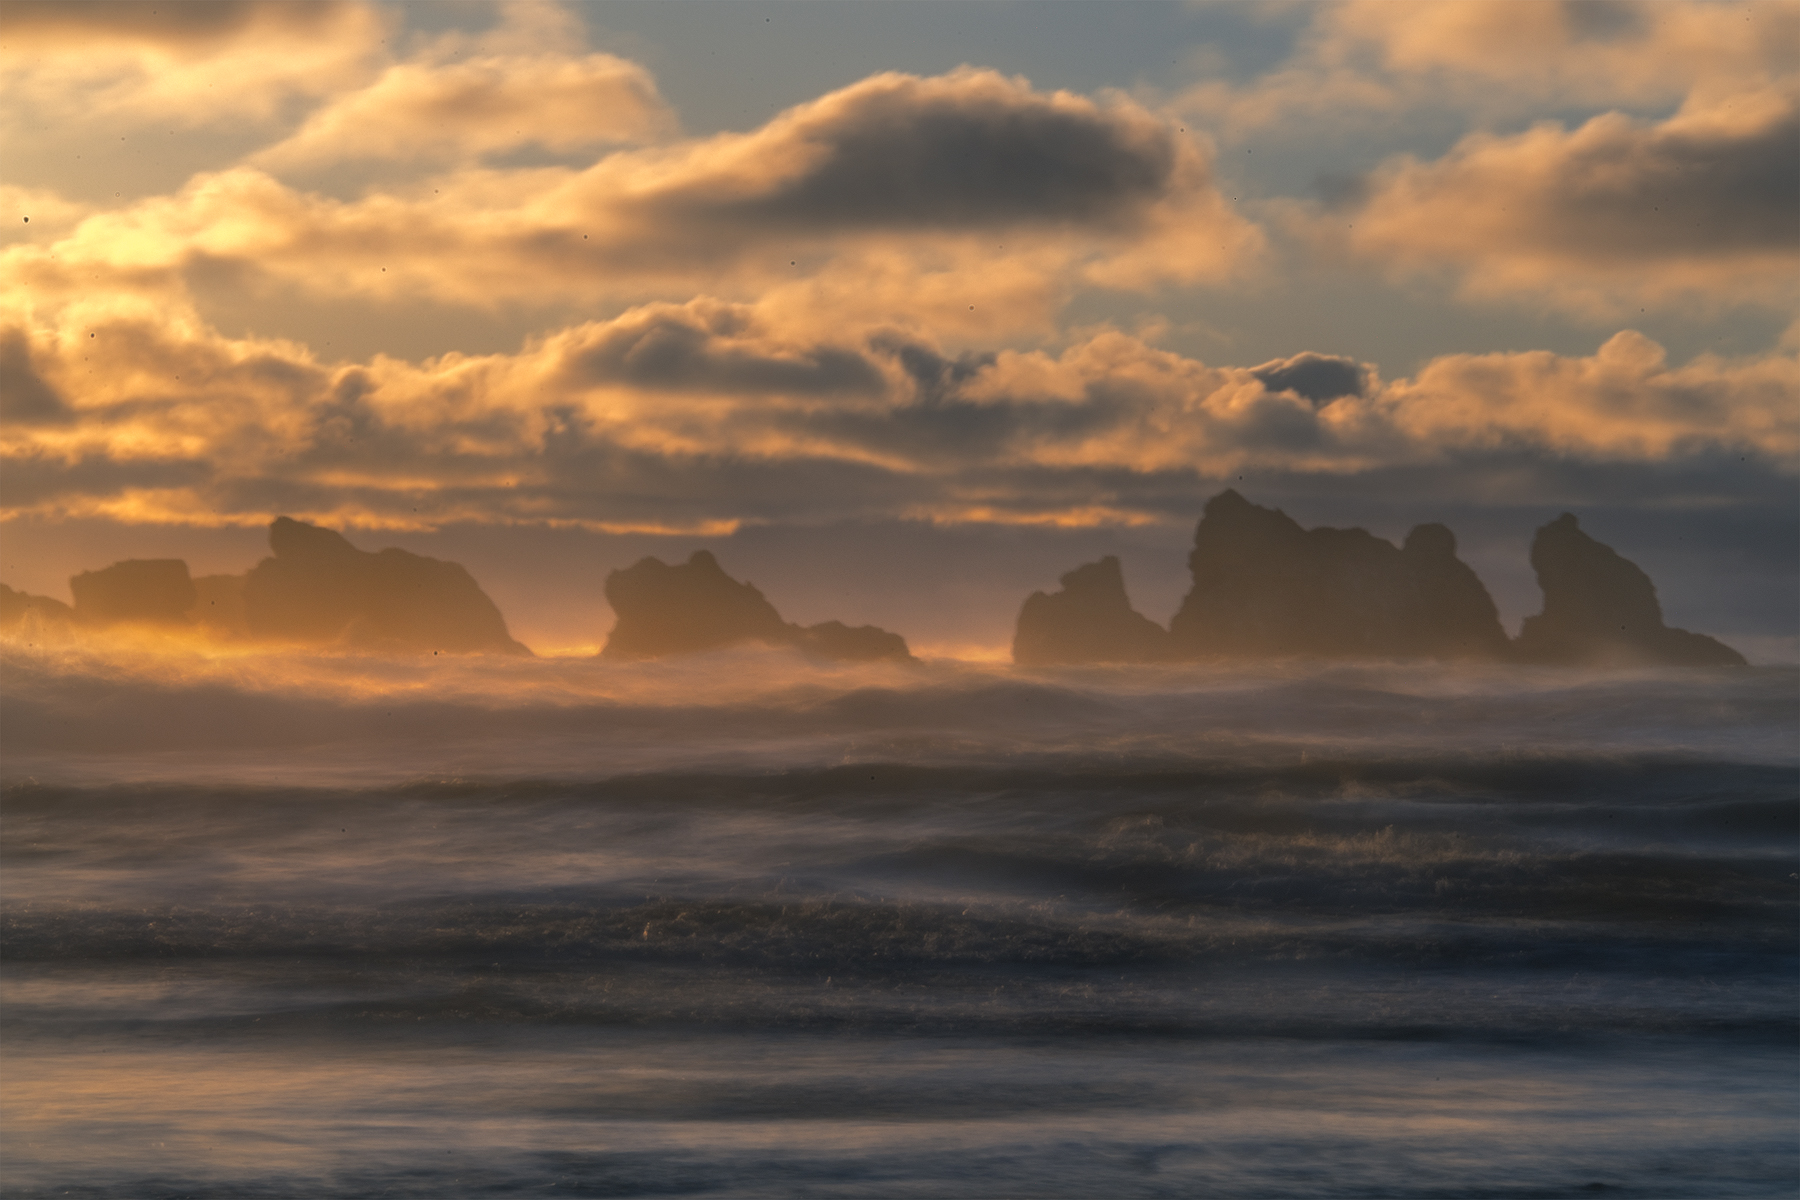
Shoot the sun below the horizon to create color harmony between the warm and cool tones
My next recommendation would be to buy a form of protective waterproof outer gear that protects your camera from the water and rogue waves. In the past, water has splashed against my body and gotten inside my camera. Even though cameras these days are water-resistant they are not waterproof. It does not take much for salt water to get inside your camera and destroy the electrical components. I use both a rain sleeve and a camera skin. The camera skin fits snug around the camera and helps prevent accidental water exposure to the camera.
When working with water and more specifically ocean photography it’s essential to have a dry cloth that can be accessed easily to dry the front of your lens. I like to keep it on me and in a place that I can quickly get access to it. Water droplets on a lens is a surefire way to prevent capturing good images.
Concerning the actual camera equipment to be used photographing oceans, having a quality camera and lens goes a long way. It does not mean you cannot come away with impactful images, but it can make it a lot harder. I like to use full frame cameras that capture a more extensive dynamic range. Photography at sunrise and sunset can present enormous challenges when it comes to exposure and contrast. Having a camera where you can keep camera-bracketing to a minimum will be an asset. Any of the popular high-end cameras will achieve this. I think it’s crucial to auto bracket images when shooting directly into the sun. Also, when shooting straight into the sun, I never use a polarizer. Adding another piece of glass in front of your lens contributes to lens flare which is never a good thing. A UV filter should never be placed on the lens as well. I like to use my polarizer when photographing ocean images during the twilight when the sun is below the horizon. Using a color intensifier polarizer allows me to capture vibrant, rich colors of the earth’s shadow and ambient light. It also enhances the color in the foreground reflections and ripples. The polarizer helps me get that color impact in the foreground that helps balance the color with the horizon and sky.
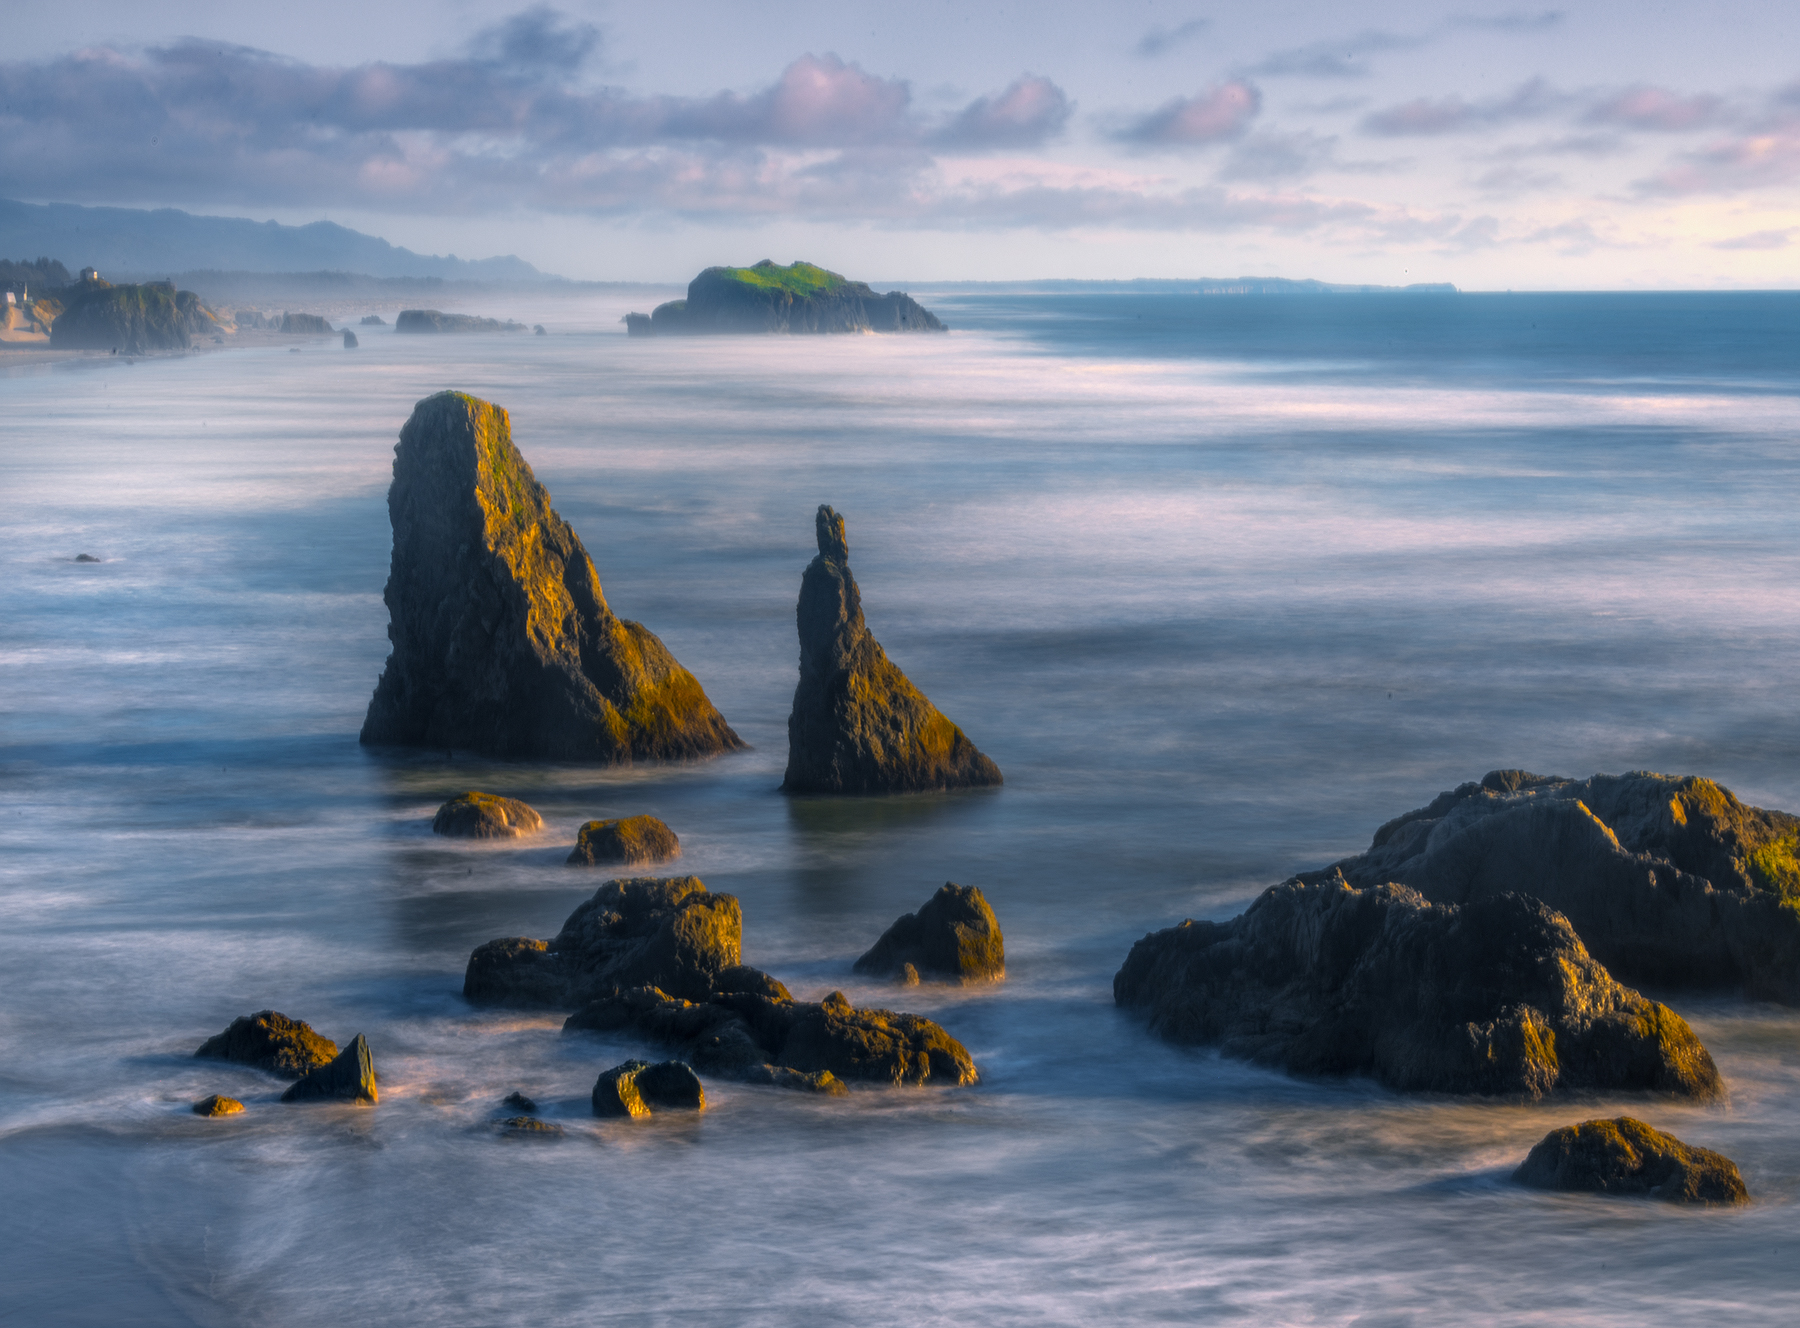
Using a Color Intensifier Polarizer Increased The Reflecting Color In The Rocks
The next piece of equipment I recommend is a wide-angle lens. The reason I like to use a wide-angle is it allows me to get closer to my foreground subject. The foreground subject could be a rock, reflecting tidepool, or even an incoming wave. Having a lens in the 11-18mm range allows me to capture more of what is happening in the foreground. The makeup of the lens which allows a broader view gives the illusion that elements are closer to the lens to appear larger than they are. One of my main goals when photographing “oceanscapes’ is to create immediate impact in the foreground which helps gain the immediate viewer attention. I like to place the camera on a 45-degree angle close enough to the foreground subject that allows the viewer to experience the scene which I am photographing.
As mentioned before having a quality lens helps capture all the tonal values and details allowing a satisfying end product. Having a quality camera and lens allows the photographer to come away with as much as the details and tonal values. In post-processing, this enables you to push pixels further to attain the final goal.
When it comes to the ever-changing movements of the ocean, having a quality tripod and ballhead is vital. With the constant moving of water, it’s important that the tripod and ballhead stay sturdy enough to avoid movement in the image. Having a tripod which is on the lighter side moves around very easily. Rushing waves and loose sand movement can cause the tripod to sink and move resulting in blurry images. One of the tricks I like to implement when using lighter tripods is digging the tripod legs deep into the sand to avoid any unintentional movement. Another technique I like to use to weigh the tripod down is to hang something like my camera bag on the center bottom console. This technique helps keep the tripod from any slight movement.
The next equipment choice is my favorite tool for capturing the right mood for every occasion. That equipment choice is a 5-10 neutral density filter or ND filter. Depending on the amount of light in the scene, using an ND filter allows me to increase the shutter speed time. The ND filter, when placed on your lens, darkens the scene allowing for longer shutter speed to achieve proper exposure. The benefit of this action creates a different mood entirely. Rather than the image displaying a fast action image of the water, the filter creates smooth water patterns — the two different types of image host polar opposite moods. Having an ND filter gives me the option to create a variety of different feelings when it comes to the creativity side of oceanscapes.
Using a fast shutter speed to capture the power of the ocean
Use a longer shutter speed to accentuate a calmer and soothing mood
The next subject for improving ‘oceanscape’ images is composition. When it comes to framing the elements in the scene, it’s important to keep things simple. It’s too easy when choosing what to include in the frame to include too much. The final image is too busy and has nowhere for the viewer to focus. Like other landscape scenarios framing is a matter of inches. It’s essential to look for shapes and repeating patterns that simplify the image. To achieve the best and most creative compositions, I like to take the camera off the tripod. Initially, I begin the process of finding a good composition by walking around with the camera in my hand close to the ground. Checking the LCD viewer on the back of my camera allows me to look for more opportunities that would not be available to me if I was on a tripod. With photography, we are always looking to create something fresh and new. Since most photographers never take their cameras off their tripod, you are more likely to get more creative. One of the most effective ways to stand out with your images is trying to get out of your comfort zone. I look for compositions that push the boundaries as I continue to develop a style that is my own.
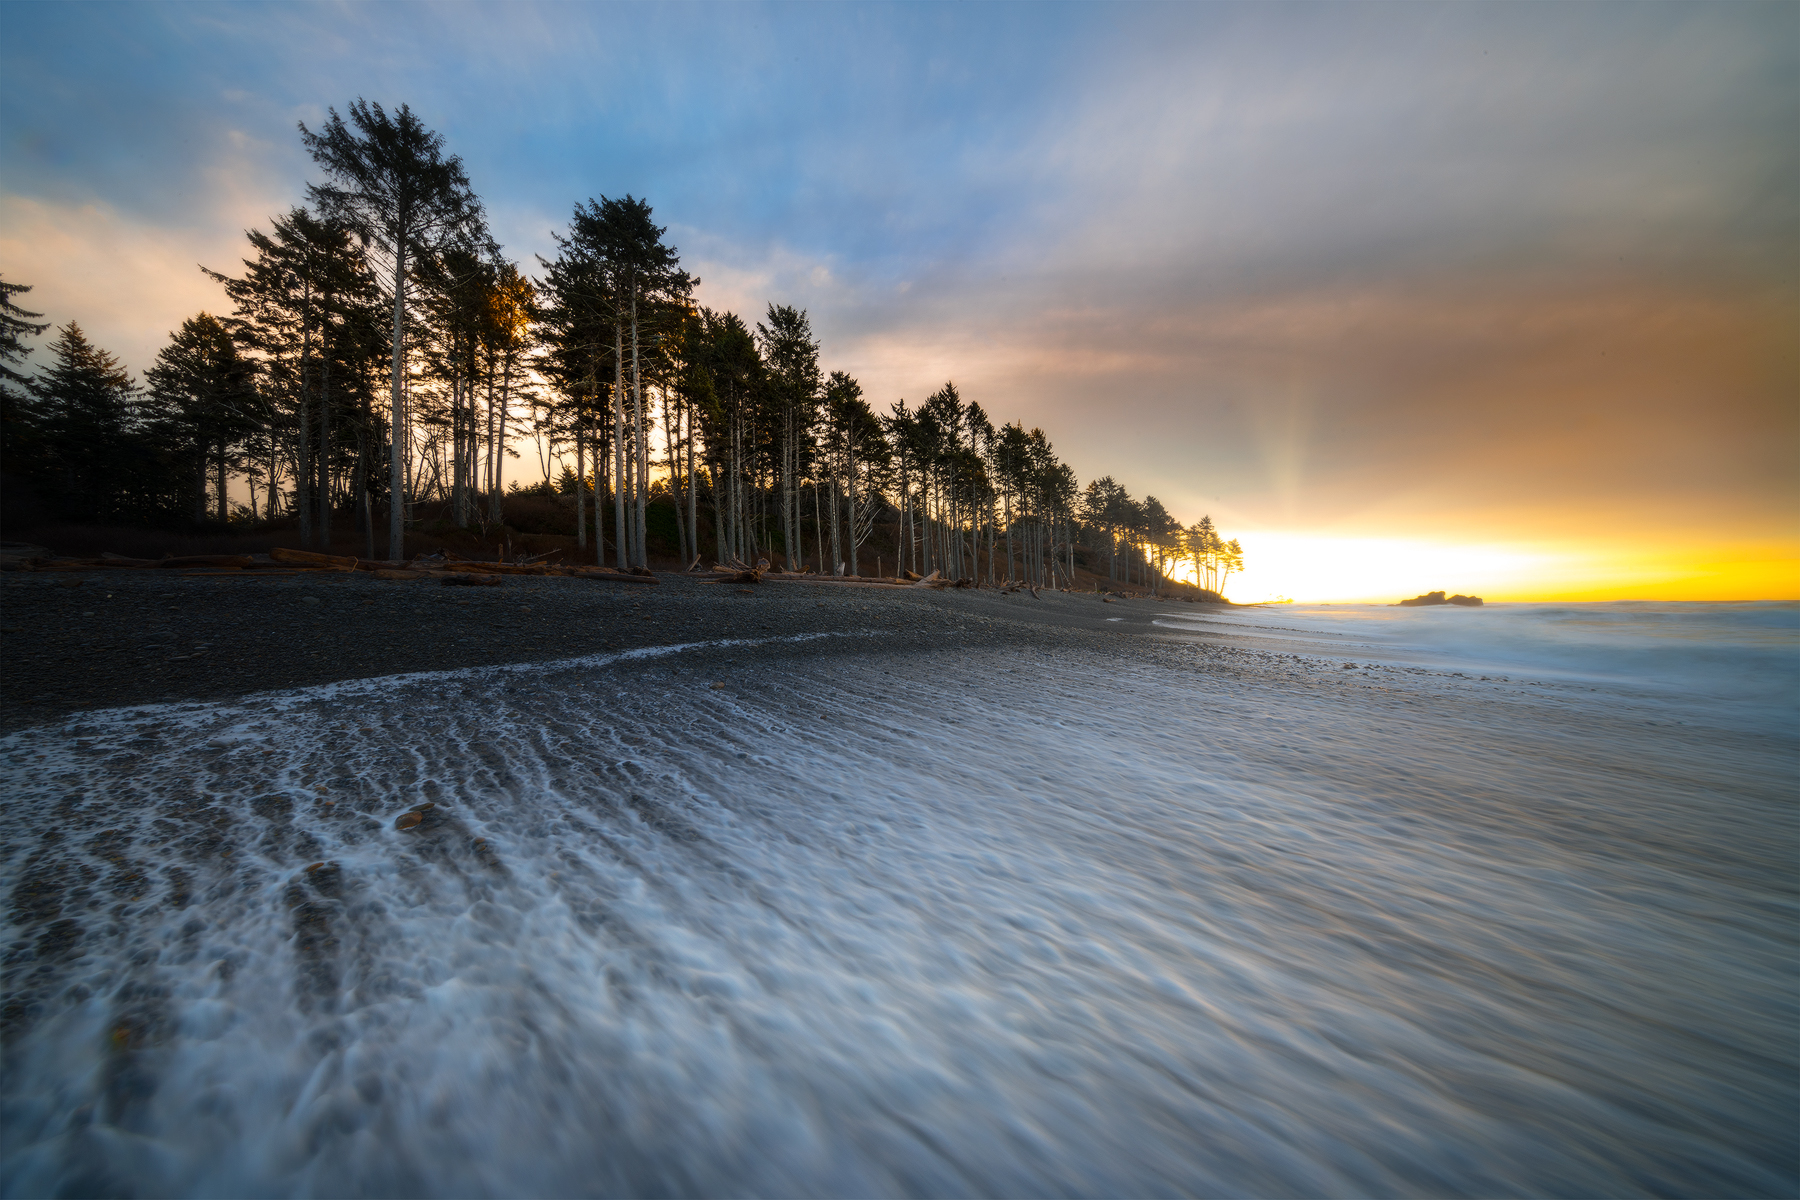
When it comes to the timing of shooting images on a beach, I try to photograph the sun as close as I can to the horizon to avoid hot spots that can occur when the position of the sun is higher. The sun closer to the horizon strikes a delicate balance with reflected colors in the sky and foreground but not overwhelming. The warmth of the sun near the horizon gives the image an overall warm balance that is inviting to the viewer. I also like to take pictures before and after the sun has gone below the horizon. The overall tone of the image is more neutral and more natural to work with in post-processing. In the scenario when the sun is below the horizon, the color balance of the image is a cooler tone. The mood is much different than with the sun but equally effective in terms of mood. It’s crucial to incorporate mood into your images. It sets the tone for the story of the image you are presenting to your audience. Another way to inject different mood into your images is by using a variety of shutter speeds. The mood of an image shooting a fast shutter speed to catch the action of the water is going to possess a bold, dynamic, and energic mood. Going the other way and using an ND filter to use a long shutter speed such as thirty seconds creates a very soft, soothing, and peaceful mood. The longer exposure is a much different mood than using fast shutter speeds. I prefer to shoot my compositions in a variety of ways thus allowing me options later in post-processing. One of the techniques that create impact is photographing the waves and tide as it rushes up the beach toward you. Shooting at around one second gives the water a streaky appearance. The moving water gives the viewer a real appreciation of the power of the ocean and what it felt like to be present in the scene.
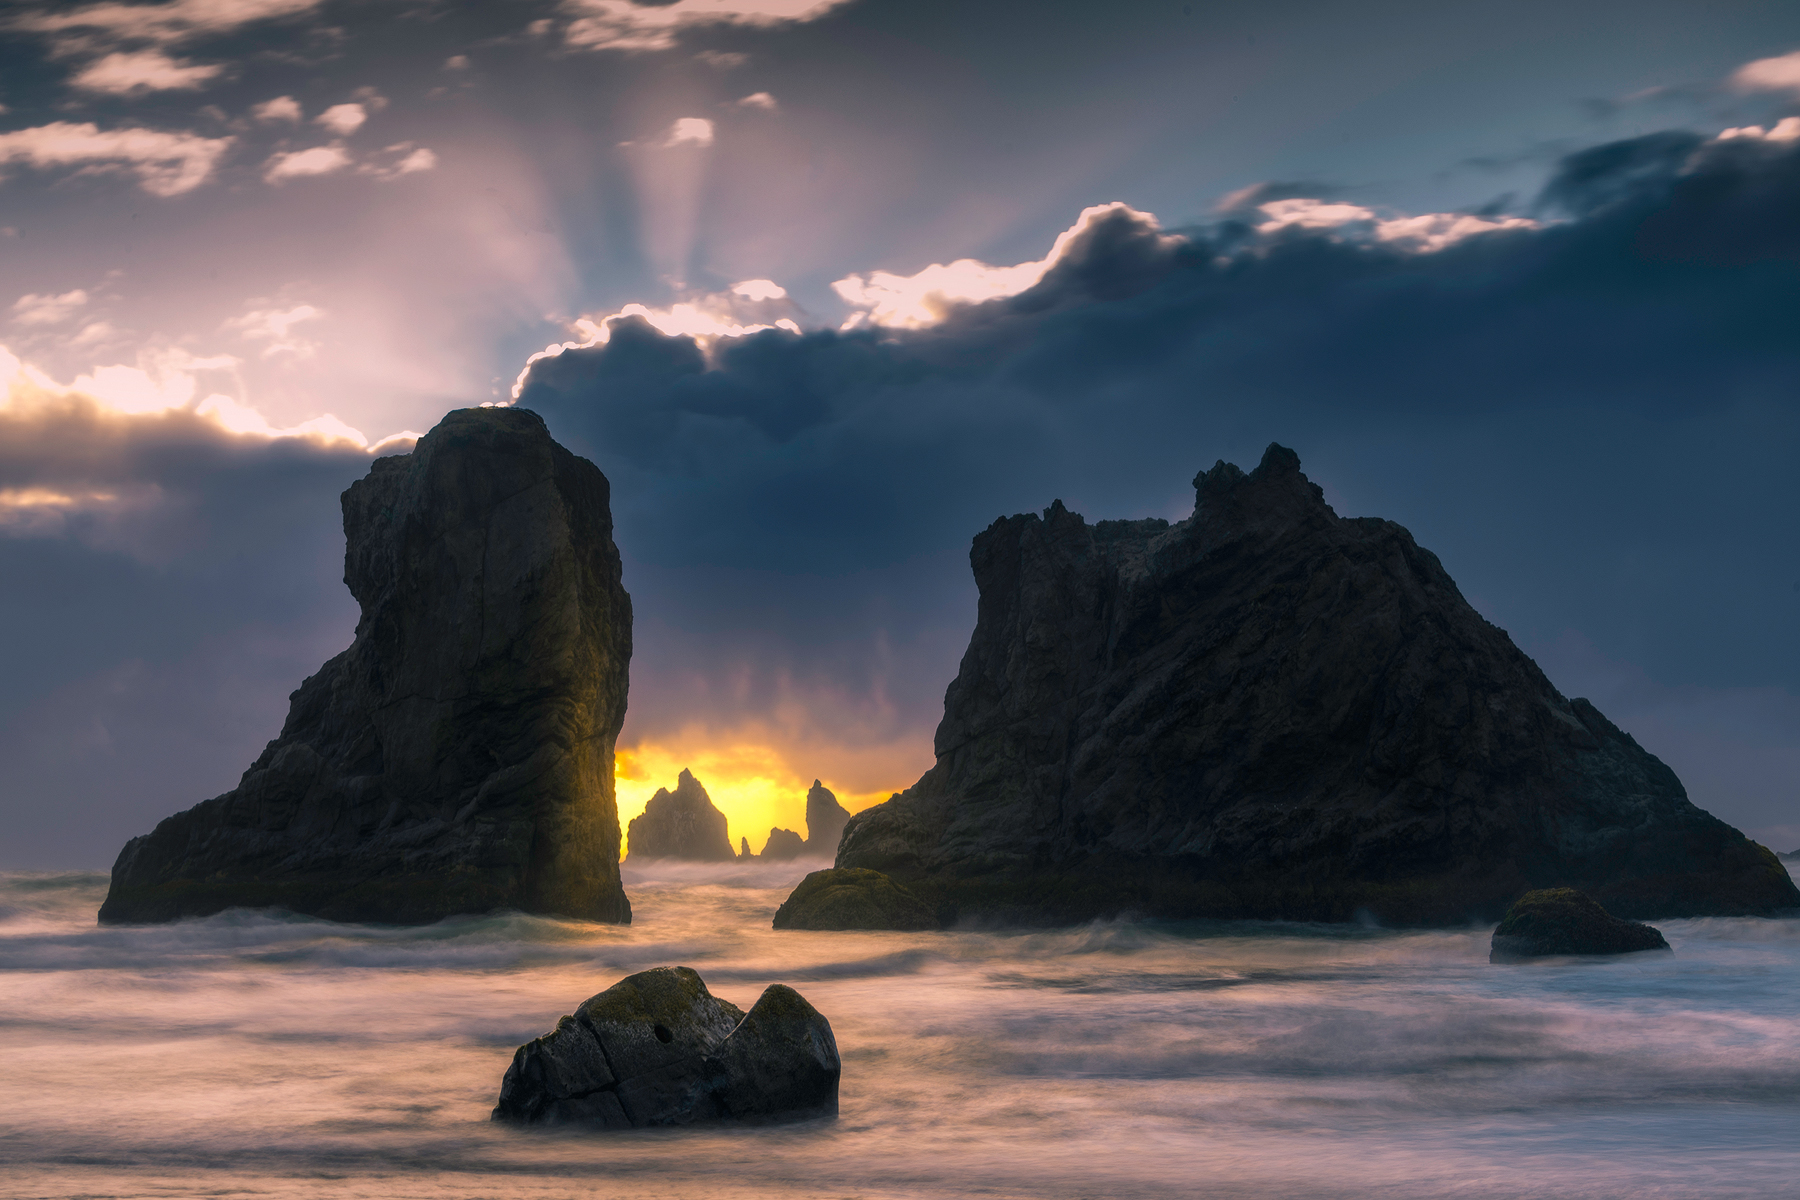
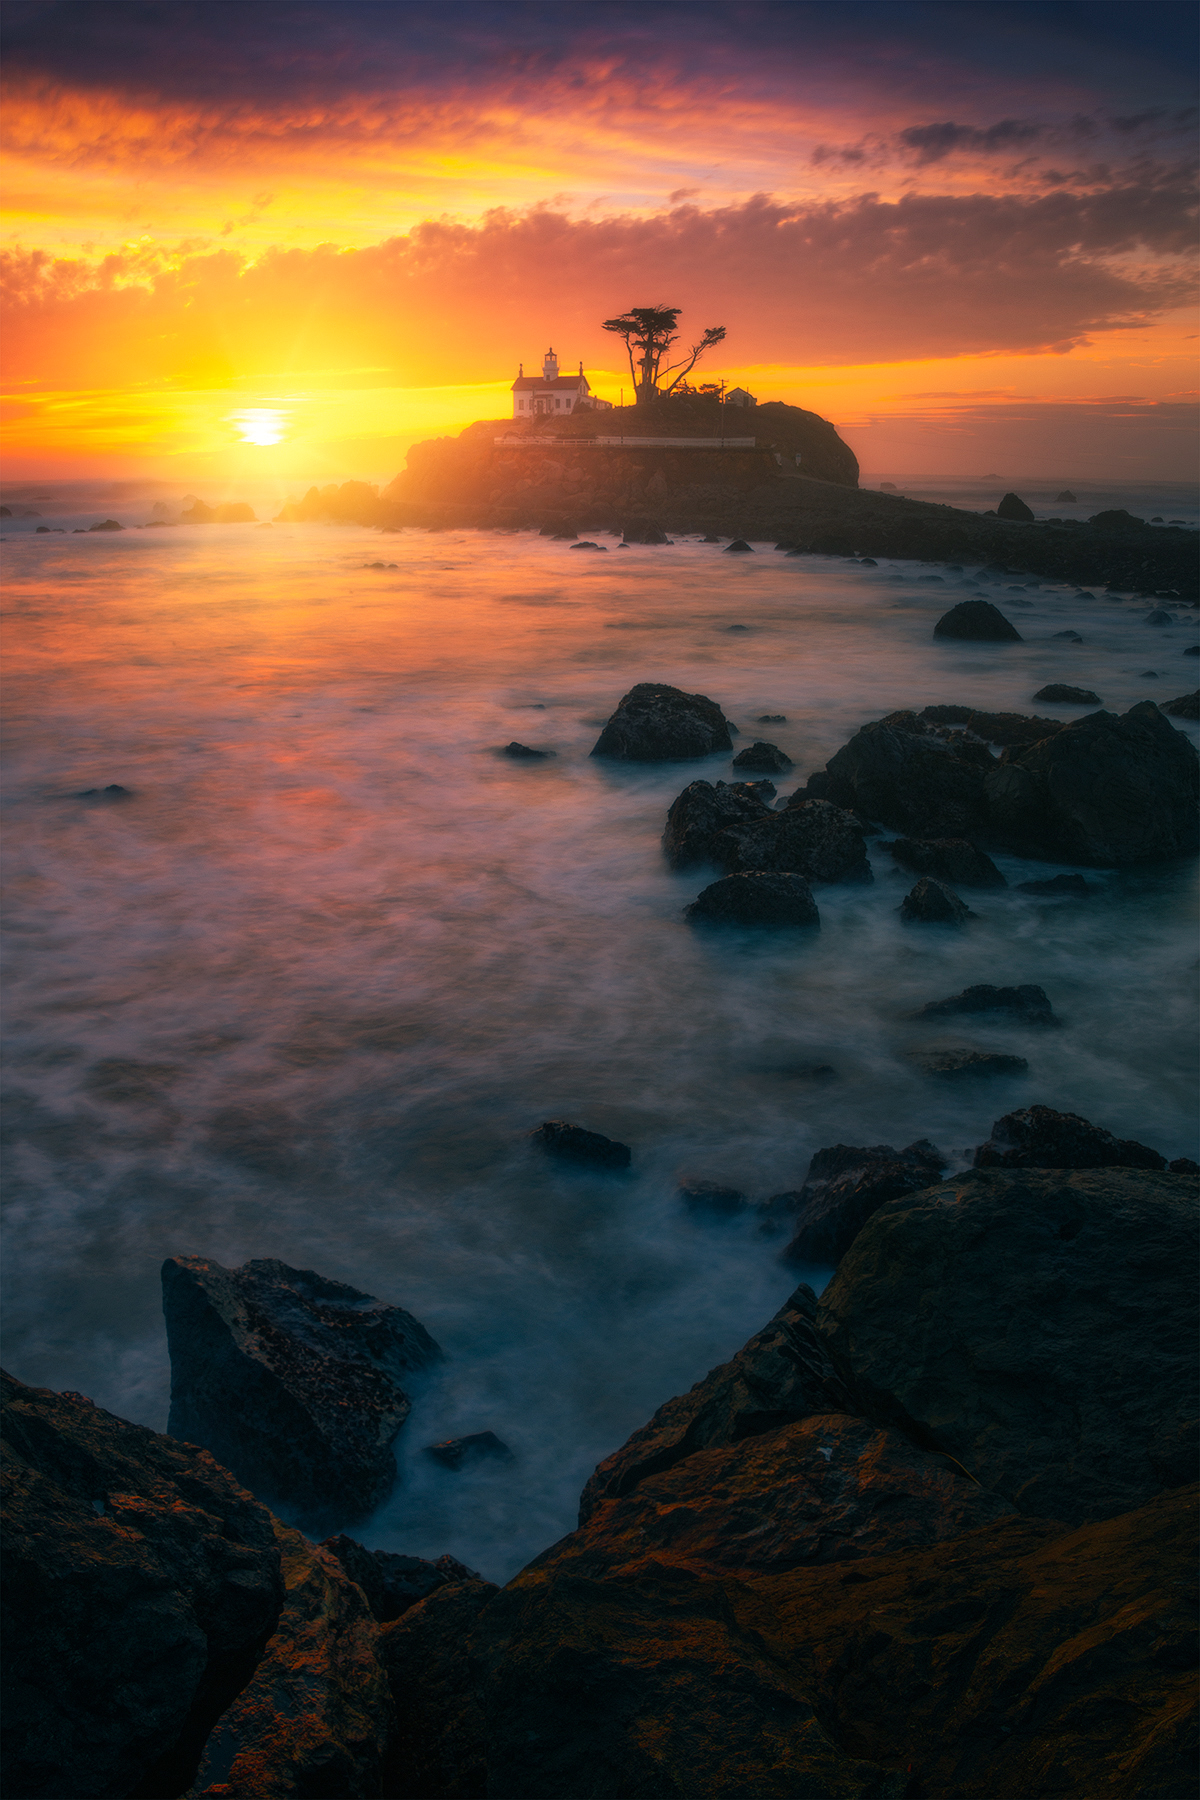
Using the outer sea stacks to frame the distant rocks and sun leading the viewer to the subject
Another aspect of composition is the theory of thirds. Pay close attention to where the main interest lies in your image. I avoid placing the horizon in the middle of the image when possible. If there is not much interest in the sky when it comes to color and clouds, I will focus my attention on the foreground. The impact on the foreground allows the viewer to focus on the immediate elements. If something is happening in the sky, I will focus the scene on a more significant proportion of the sky.
When it comes to foreground and elements, look for something interesting in your foreground. At low tide, I am always looking for tide pools. When there are beautiful clouds and color, they make for stunning mirrors. They also help simplify the scene and bring attention to what is most important in the scene. If I include sea stacks or rocks out in the ocean, I am mindful of making sure they balanced throughout the scene. It’s important to remember that every element has a weight to it and that if all the parts are one side, the image becomes lopsided. I try to frame my scene in terms of odd numbers so that I am photographing in threes and fives when it comes to the elements. Think of the scene as a fulcrum and that even balance of items needs to be dispersed evenly across the scene.
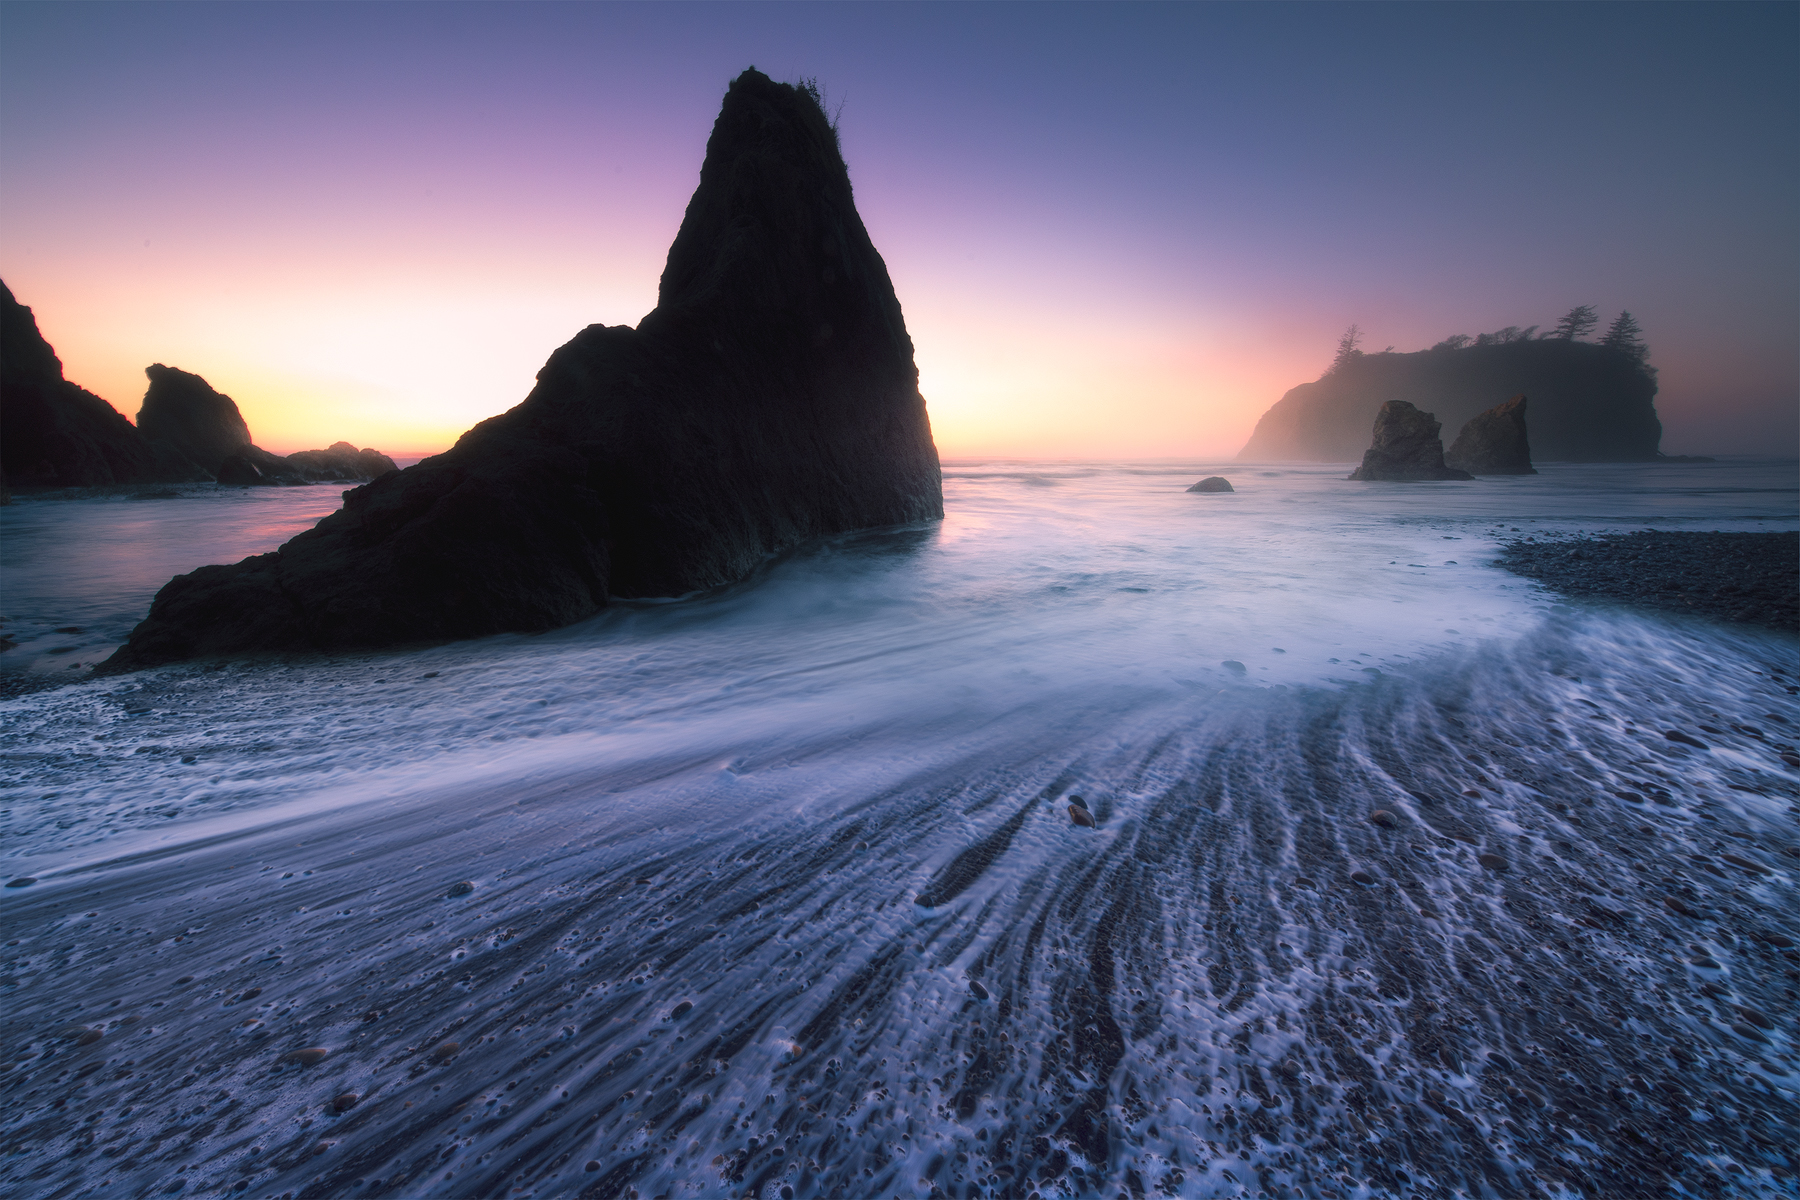
Use streaking waves to add immediate impact to the foreground and allow your audience to be part of the scene.
Lastly, an essential part of success when photographing the ocean is safety. It is critical to be aware of the rising water and to avoid getting caught in a high tide. Be aware of escape routes off the beach at high tides.
Take time to study the patterns of the incoming waves and watch for rogue waves. People underestimate the power of the ocean, and they get swept off their feet and fall into the sea. Always have a safety plan to exit in case of unexpected waves. It is easy to lose a camera to the ocean as well as become injured from the elements such as rocks and other items in the water. It’s a lot of fun to dip your feet into the ocean but always never tread deep enough that you can get caught in the waves.
Just remember to have fun and that safety is more important than capturing a great photo if you are not around to share it.
Website: www.kevinmcnealphotography.com
Facebook: https://www.facebook.com/kevinmcneal30
Instagram: www.instagram.com/kevinmcneal30
Flickr: https://www.flickr.com/photos/kevinmcneal
Kevin McNeal is a landscape photographer who resides in the Pacific Northwest of the U.S. He focuses on grand colorful landscapes that reflect the most unique places on earth. Capturing moments of magic light and transferring this on print, images behold a combination of perseverance, patience, and dedication to capture the images in ways unseen before. The stories of how these images are rendered come across in the feelings the images convey.
Recent Comments